Deployment
- 1-Click Deployment on DigitalOcean
- Environment Variables
- Docker Guide
- LDAP interface working example
- Sending E-mails
- Update an existing titra instance (Docker)
- Titra on Synology nas DSM
- Zammad Interface
- Wekan Integration
- OpenID Connect (OIDC) Authentication
- API documentation
- MongoDB version compatibility
1-Click Deployment on DigitalOcean
titra is available in the DigitalOcean Marketplace for easy 1-click deployment of droplets. Get started below:

Environment Variables
ROOT_URL: the URL under which titra is served. Could be http://localhost:3000 for a local instance or https://app.titra.io for a setup with reverse proxy and DNS records.
MONGO_URL: the URL of the mongoDB backend (e.g. mongodb://localhost:27017/titra)
MONGO_OPLOG_URL: the URL pointing to the OPLOG of the mongoDB backend (e.g. mongodb://localhost:27017/local)
MAIL_URL: The server reads from the MAIL_URL environment variable to determine how to send mail. The MAIL_URL should reference an SMTP server and use the form:
smtp://USERNAME:PASSWORD@HOST:PORTor
smtps://USERNAME:PASSWORD@HOST:PORTThe smtps:// form (the s is for “secure”) should be used if the mail server requires TLS/SSL (and does not use STARTTLS) and is most common on port 465. Connections which start unencrypted prior to being upgraded to TLS/SSL (using STARTTLS) typically use port 587 (and sometimes 25) and should use smtp://. For more information see the Nodemailer docs
METEOR_SETTINGS are Deprecated starting with titra version 0.18.0
Please use the new Globalsettings available for administrators through the Administration page.
METEOR_SETTINGS: the titra specific settings in JSON format, all settings have to belong to the “public” hierarchy. The available parameters are:
disablePublic: true/false – if set to true, projects can not be set as public
enableAnonymousLogins: true/false – if set to true, the /try path will be available allowing anonymous accounts to be created on the fly.
Below is an example for a METEOR_SETTINGS environment variable value:
{
  "public": {
   "disablePublic": "true",
   "enableAnonymousLogins": "true"
  }
}
Docker Guide
Deploying titra with Docker
You will need a MongoDB container to use titra. Here is an example to get started:
docker run --name mongodb -p 27017:27017 mongoPlease note that this basic approach will store all database data in a transient Docker volume – this is not a good approach to run MongoDB in production! Checkout this guide for a more sophisticated approach on how to get started with running MongoDB in Docker.
Once the database is ready, titra needs to be aware of that container, an easy way to achieve this is using –link:
docker run --name titra -p 3000:3000 --link mongodb -e MONGO_URL=mongodb://mongodb/titra -e ROOT_URL=http://localhost:3000 kromit/titraIn addition to the manual steps above, you can also use docker-compose to deploy the whole stack:
curl -L https://github.com/titraio/titra/raw/master/docker-compose.yml | ROOT_URL=http://localhost:3000 docker-compose -f - upPlease note that our standard Docker compose file does not map a volume for the database files and thus everything is stored in a transient Docker volume.
Congratulations! titra should now be up and running at http://localhost:3000
Persisting MongoDB database files
As mentioned above, the MongoDB container will fallback to using transient Docker volumes if not specified otherwise. If you are planning to run titra in production you should therefore specify a volume mapping for the container path /data/db. A ready-to-roll production yml file can also be found in the titra GitHub repository which maps the container path to /root/mongodb. This setup is used for the DigitalOcean one-click deployment app.
LDAP interface working example
The LDAP implementation should support most LDAP configurations out-of-the-box.
To prevent exposure of sensitive credentials, the configuration of the interface is only available through environment variables passed to the titra service.
A minimal working example for an LDAP interface without authentication could look like this:
LDAP_HOST=ldap.kromit LDAP_PORT=389 LDAP_BASEDN="ou=People,dc=kromit,dc=com"
And a more complex working example if the uid in your LDAP is not the e-mail address which is the main identifier for titra before using LDAP and anonymous binds are not available:
LDAP_HOST=ldap.kromit LDAP_PORT=389 LDAP_BASEDN="dc=kromit,dc=at" LDAP_AUTHENTICATION_USERDN="cn=admin,dc=kromit,dc=at" LDAP_AUTHENTICATION_PASSWORD="supersecret" LDAP_USER_SEARCH_FIELD="mail" LDAP_USER_AUTHENTICATION=none LDAP_EMAIL_MATCH_ENABLE=true LDAP_MERGE_EXISTING_USERS=true
Due to the fact that environment variables are used for configuring the LDAP interface, the titra service has to be restarted to use it.
The following variables are available:
- LDAP_HOST: The hostname of the LDAP server (mandatory)
- LDAP_PORT: The port of the LDAP server (mandatory)
- LDAP_BASEDN: The base dn for the LDAP search (mandatory)
- LDAP_RECONNECT: Reconnect to the server if the connection is lost?
- LDAP_TIMEOUT: The timeout of the LDAP connection (defaults to 10000ms)
- LDAP_CONNECT_TIMEOUT: The timeout of the LDAP connection attempt (defaults to 10000ms)
- LDAP_IDLE_TIMEOUT: The idle timeout of the LDAP connection
- LDAP_ENCRYPTION: If using LDAPS, set it to 'ssl', else it will use 'ldap://'
- LDAP_CA_CERT: The certificate for the LDAPS server
- LDAP_REJECT_UNAUTHORIZED: Reject Unauthorized Certificates? (defaults to true)
- LDAP_AUTHENTICATION_USERDN: The search user dn (defaults to the LDAP_BASEDN parameter if not provided)
- LDAP_AUTHENTICATION_PASSWORD: The search user password (optional)
- LDAP_LOGIN_FALLBACK: If the user is not found in the LDAP, try to login with the username and password? (defaults to false)
- LDAP_USER_AUTHENTICATION: The user authentication (defaults to LDAP_USERNAME_FIELD or 'uid' if neither is provided) - set to "none" to prevent user binds all-together (see complex example for a use case above)
- LDAP_USER_AUTHENTICATION_FIELD: The field used for authenticating users (defaults to 'uid')
- LDAP_USER_ATTRIBUTES: The attributes to retrieve from the LDAP
- LDAP_USER_SEARCH_FILTER: The search filter for the LDAP user search
- LDAP_USER_SEARCH_SCOPE: The scope of the LDAP user search filter
- LDAP_USER_SEARCH_FIELD: The field containing the user field for the LDAP search filter (defaults to LDAP_USERNAME_FIELD or 'uid' if neither is provided)
- LDAP_SEARCH_PAGE_SIZE: The number of results per page for the LDAP user search
- LDAP_SEARCH_SIZE_LIMIT: The maximum number of results for the LDAP user search
- LDAP_GROUP_FILTER_ENABLE: Enable LDAP group filter? (defaults to false)
- LDAP_GROUP_FILTER_OBJECTCLASS: The objectclass for the LDAP group filter
- LDAP_GROUP_FILTER_GROUP_ID_ATTRIBUTE: The attribute containing the group id for the LDAP group filter
- LDAP_GROUP_FILTER_GROUP_MEMBER_ATTRIBUTE: The attribute containing the group members for the LDAP group filter
- LDAP_GROUP_FILTER_GROUP_MEMBER_FORMAT: The format for the LDAP group filter
- LDAP_GROUP_FILTER_GROUP_NAME: The name of the group for the LDAP group filter
- LDAP_USERNAME_FIELD: The field containing the username field (defaults to 'uid')
- LDAP_LOG_ENABLED: Specifies wether logs are printed to STDOUT or not (defaults to false)
- LDAP_EMAIL_MATCH_ENABLE: Try to find the titra user based on the e-mail address (defaults to false)
- LDAP_MERGE_EXISTING_USERS: Try to merge existing users when they try to login through LDAP for the first time (defaults to false)
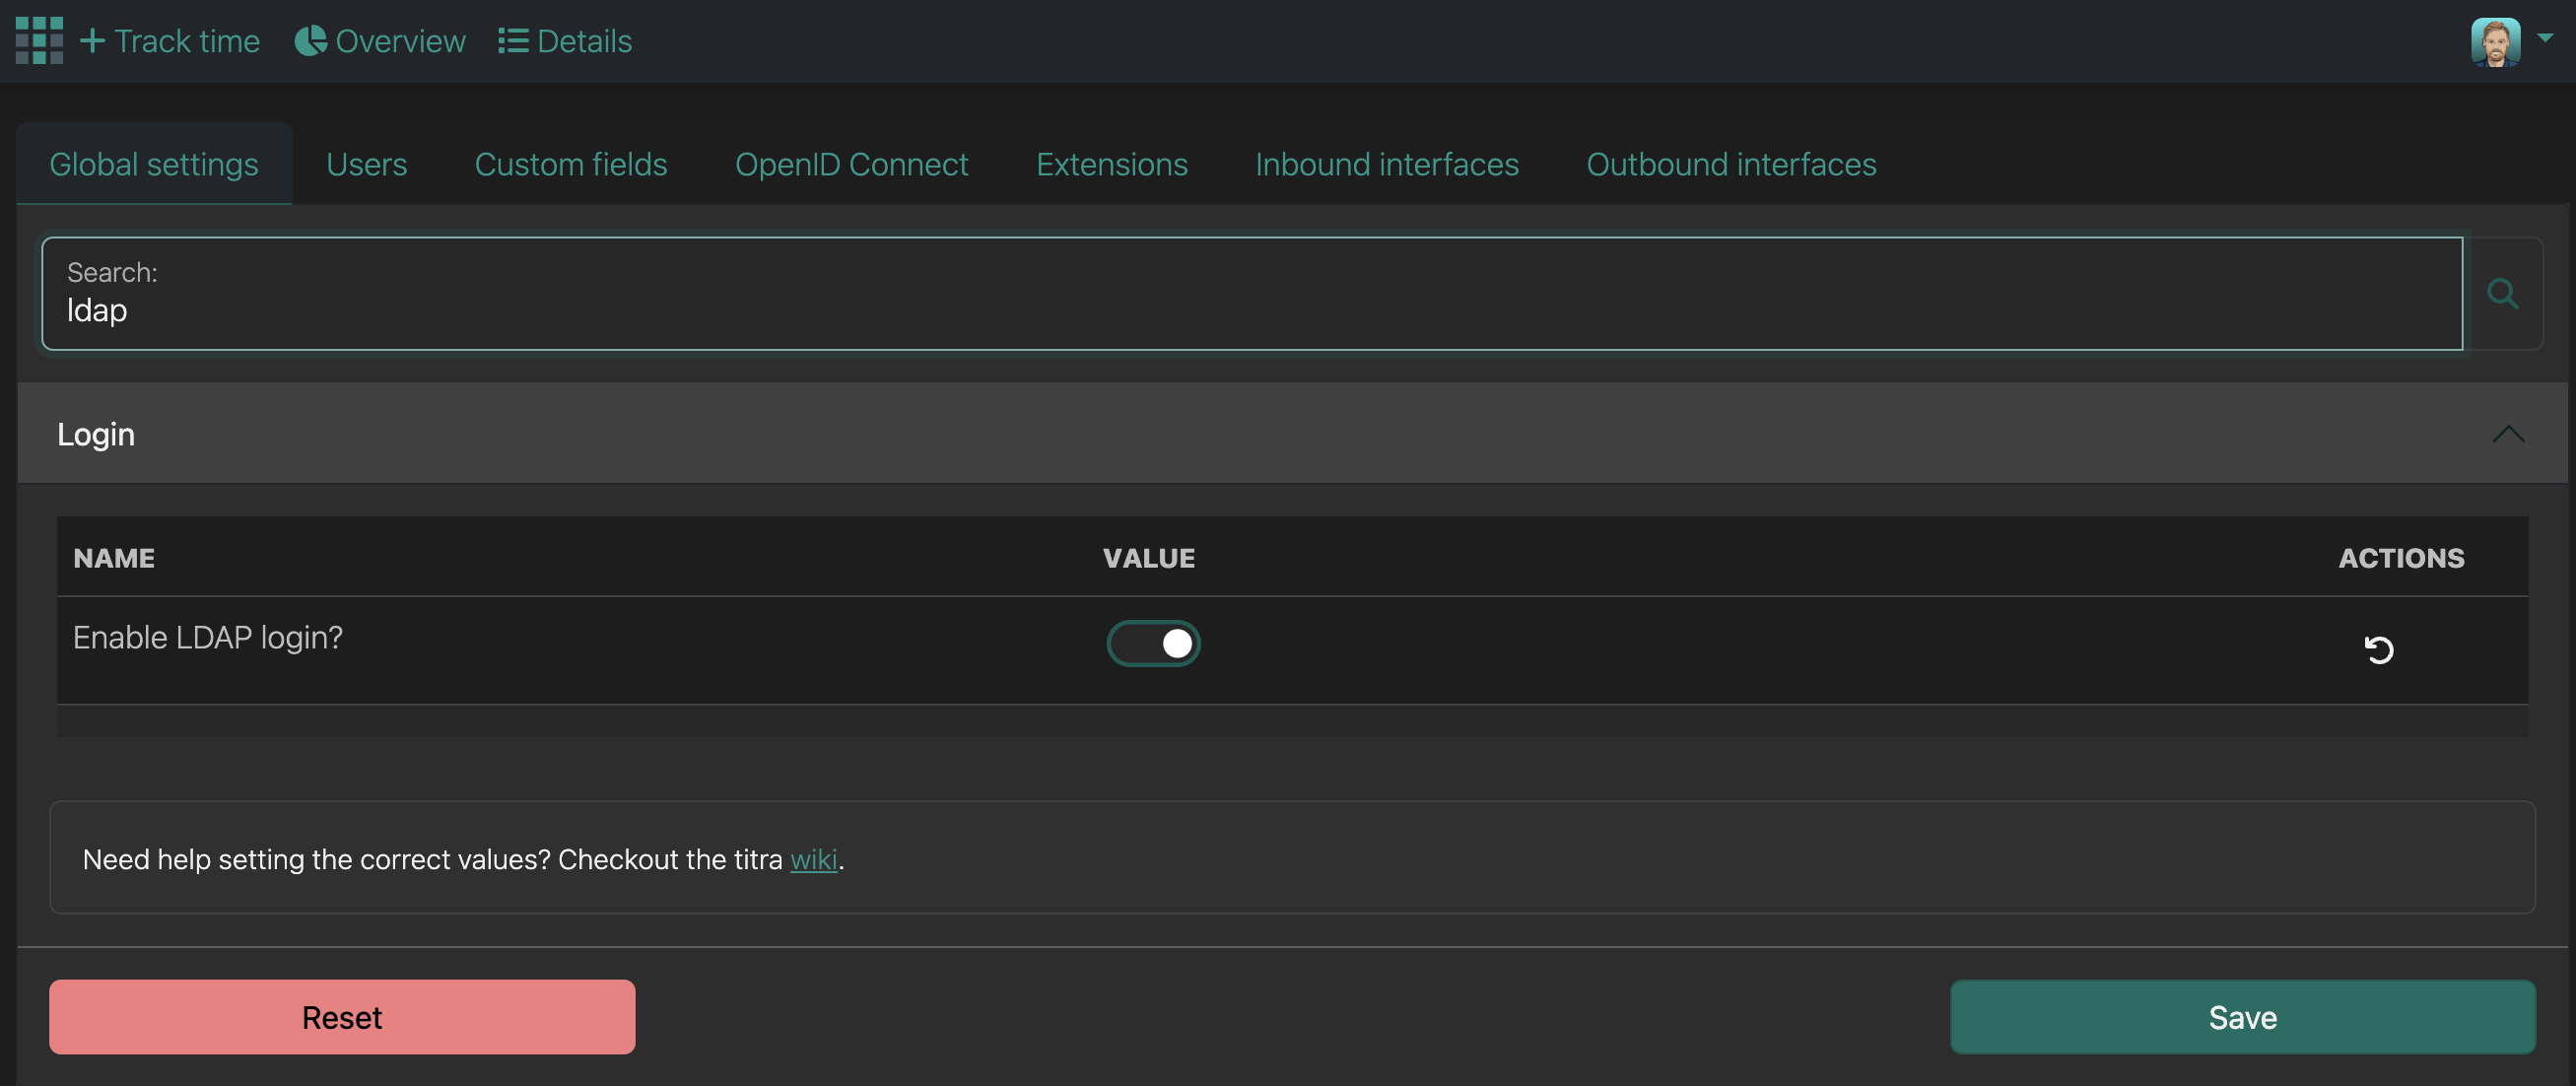
After all environment variables are set, the last step is to enable the LDAP login in the Administration > Global settings page:
Sending E-mails
Environment Variables
MAIL_URL: The server reads from the MAIL_URL environment variable to determine how to send mail. The MAIL_URL should reference an SMTP server and use the form:
smtp://USERNAME:PASSWORD@HOST:PORT
or
smtps://USERNAME:PASSWORD@HOST:PORT
The smtps:// form (the s is for “secure”) should be used if the mail server requires TLS/SSL (and does not use STARTTLS) and is most common on port 465. Connections which start unencrypted prior to being upgraded to TLS/SSL (using STARTTLS) typically use port 587 (and sometimes 25) and should use smtp://. For more information see the Nodemailer docs
Docker Setup
The MAIL_URL can be passed to Docker with the -e parameter:
docker run --name titra -p 3000:3000 --link mongodb -e MONGO_URL=mongodb://mongodb/titra -e ROOT_URL=http://localhost:3000 -e MAIL_URL=smtp://USERNAME:PASSWORD@HOST:PORT kromit/titraIt can also be added in a similar way with docker-compose:
version: '3'
services:
  titra:
    image: kromit/titra
    container_name: titra_app
    depends_on:
      - mongodb
    environment:
      - ROOT_URL=${ROOT_URL}
      - MONGO_URL=mongodb://mongodb/titra?directConnection=true
      - PORT=3000
      - MAIL_URL=smtp://USERNAME:PASSWORD@HOST:PORT
    ports:
      - "3000:3000"
    restart: always
  mongodb:
    image: mongo:5.0
    container_name: titra_db
    restart: always
    environment:
      - MONGO_DB:titra
    volumes:
      - titra_db_volume:/data/db
volumes:
  titra_db_volume:
Update an existing titra instance (Docker)
If you have used the quick start guide in the titra Github repository you can use the following steps to update titra to the latest version:
curl -L https://github.com/titraio/titra/raw/master/docker-compose.yml | docker-compose -f - downdocker pull titraio/titracurl -L https://github.com/titraio/titra/raw/master/docker-compose.yml | ROOT_URL=http://localhost:3000 docker-compose -f - up
The commands above assume that you are executing them either as a user with root permissions or docker is running in rootless mode. Depending on your setup you might have to add 'sudo' before the docker-compose commands.
If you have used a local docker-compose.yml file to override some default settings you can of course replace the curl command with your local file.
docker pull kromit/titra will pull the latest version, however you can also use any tag to update to a specific version (e.g. docker pull kromit/titra:0.89.6)
Titra on Synology nas DSM
If your system do support Docker ( here the list ) go and install it from the Synology package center.
Once you have Docker installed open the package and go to the Registry menu to search for the images we need to run Titra.

Search for titra and double click on the titraio/titra to download the Titra’s image.
Select from dropdown the latest version available (latest tag is not working for me so i choose 0.29.0 manually)
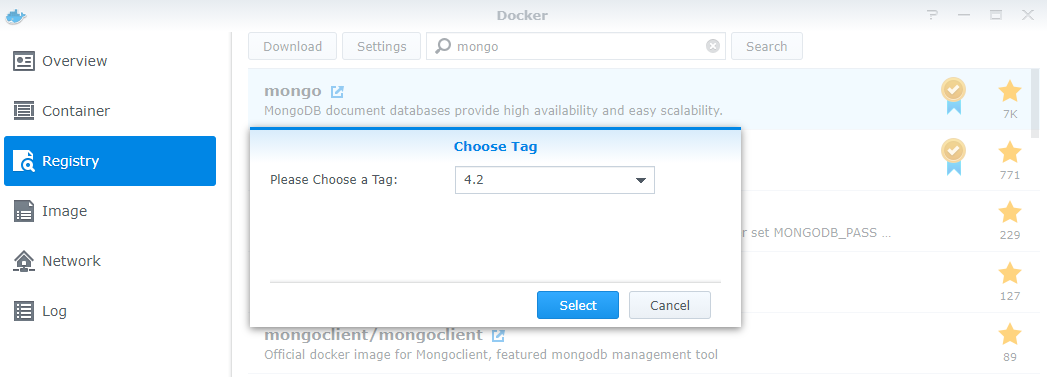
Next image needed is mongo for the mongodb
Go again in Registry and search for mongo to download 4.2 version
Once the images are downloaded go to Image section and there you’ll find them.
Now it’s time to create Containers from the images.
At first we create the db container
double click on the mongo image and select a name for the container (e.g. mongodb)

click Next and then uncheck “Run this container after the wizard is finished” before clicking Apply
Now go to container section and EDIT the mongodb container to set up a Volume for data persistency

click Add Folder and select a folder on your nas to store the db datas as mount path set /data/db and then apply.
Now start the container with the toggle you see right next to it and wait some time to have it up.
if you double click on container and go in LOG label you’ll see something like thisNETWORK [listener] Listening on 0.0.0.0
meaning mongodb is up and listening on all interfaces.
Go back to images section, now is time for creating Titra container and linking it to mongodb
Double click on Titra image, choose a name for it and click the advanced button

Go to port settings and choose a local port that is free on your system, don’t touch container port.
Now switch to Links label and click + Button to link Titra container to mongodb container

Now switch to Environment tab and set 2 new variables for the container

They must be set accordingly to your container configuration
For example:
ROOT_URL = http://10.0.1.100:3000
andMONGO_URL = mongodb://mongodb:27017/titra
as 10.0.1.100 is my local lan NAS ip
Now go Next and click apply to have the container running.
Docker could alert you that mongodb was started because its needed to Titra (it’s ok it’s our goal)
In container section you must see both container running

Let’s test if everythings gone right
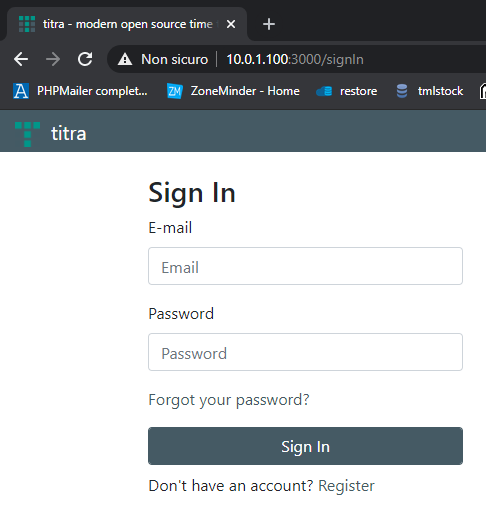
open your broswer and point it to http://nasip:port choosen before Titra should be working ?
Tutorial by github.com/tomonetml
Zammad Interface
Enable CORS
This might be specific to our setup, but after following the default installation instructions for the Zammad community edition we had to add the following to the end of our nginx configuration (/etc/nginx/sites-enabled/zammad.conf) to have a working CORS setup:
  location /api/ {
        add_header 'Access-Control-Allow-Origin' '*';
        add_header 'Access-Control-Allow-Headers' '*';
        proxy_hide_header 'Access-Control-Allow-Origin';
        proxy_hide_header 'Access-Control-Allow-Headers';
        proxy_pass http://zammad-railsserver;
  }
Create API access token
Login to your Zammad instance and go to Profile > Token Access. Create a new Personal Access token for titra. Since we are only querying ticket information we only need the ticket.agent permission to use the API:

Connect titra to Zammad

Verify and Enjoy
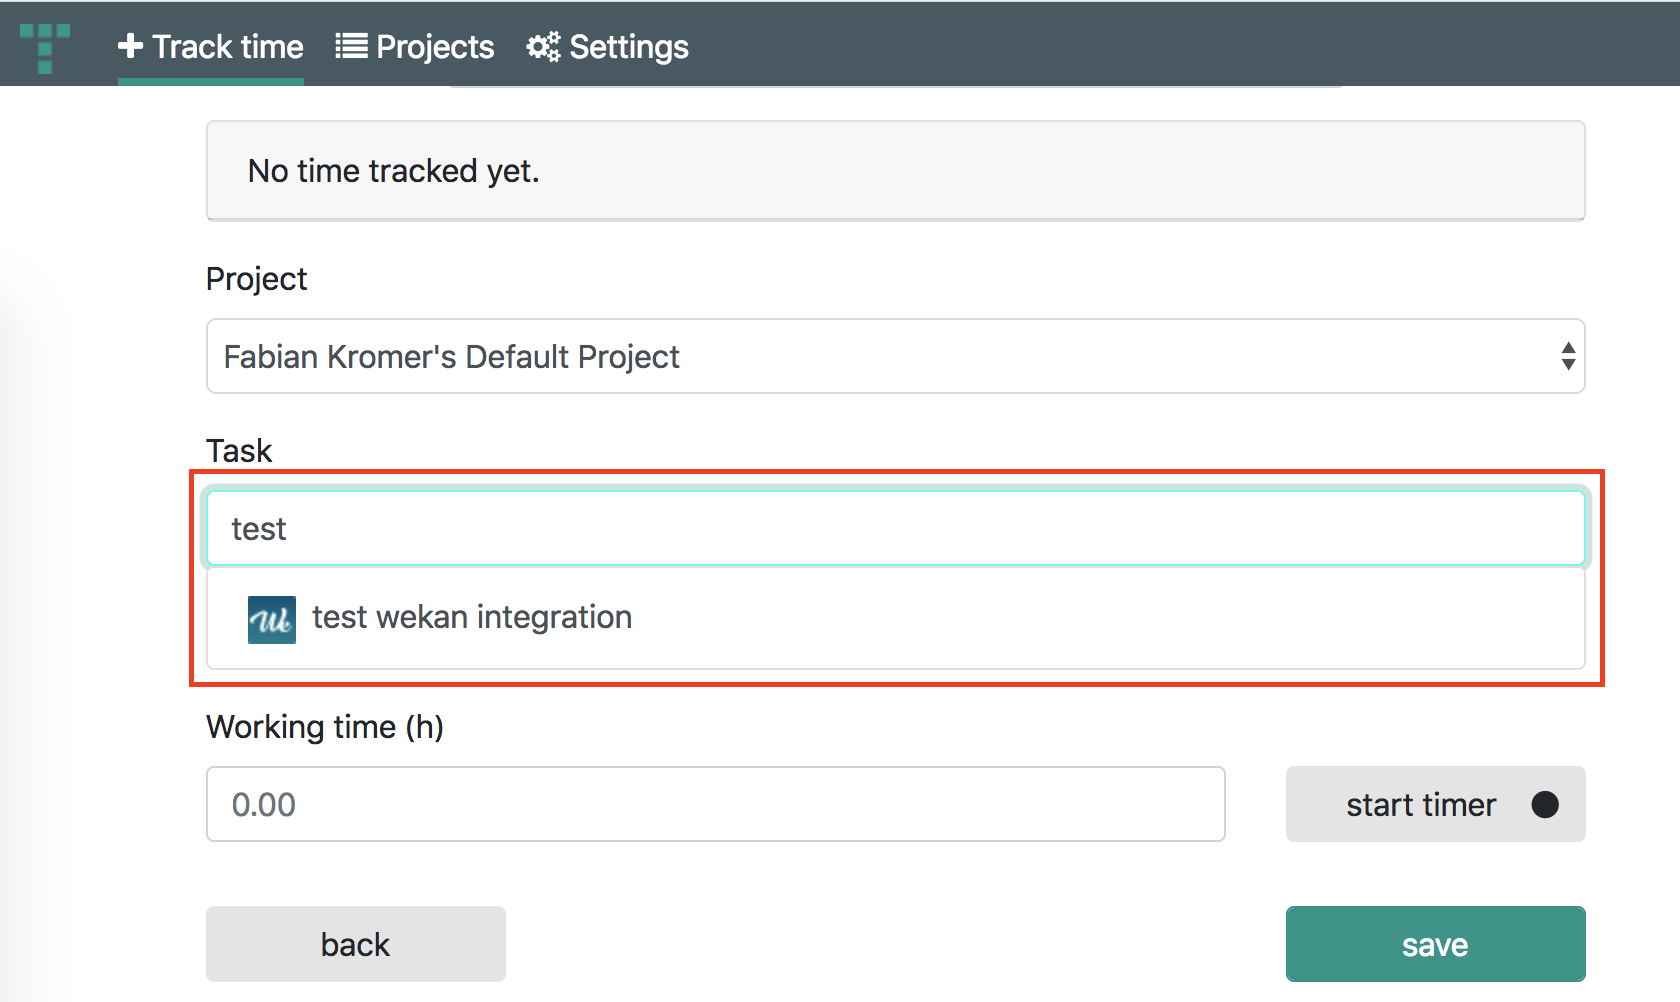
If the interface has been setup correctly you can now use your Zammad tickets as a task source for time tracking! Try searching for some of your tickets and they will show up in the task auto-complete suggestion.

Wekan Integration
The built-in Wekan integration of titra enables you to plan your project tasks in Wekan using the agile methodology and track time against these very tasks when you and your time work on them. This is powerful combination which can be used to efficiently execute projects of any size and duration.
Prerequites
- A titra environment (preferable secured over HTTPS) e.g. app.titra.io
- A Wekan environment (preferable secured over HTTPS). Attention, if the environments are served from different hosts, make sure the Access-Control-Allow-Origin header is set to allow access from the the titra environment.
For 2. this is in particular the CORS environment variables of Wekan, to enable CORS for all domains you can use the following settings: CORS=*, CORS_ALLOW_HEADERS=Authorization. More details can be found in the corresponding Wekan documentation.
How to enable and configure the Wekan integration in titra
- Enable the Wekan integration in titra
Administration > Global Settings
- Edit the project you want to link to a Wekan board
- Wekan: Click on "Export board" in the Wekan board menu
- Wekan: In the submenu Right click on "Export board to JSON" to copy the Wekan board URL

- Paste the copied URL to the project Wekan integration field, click on "Check" to validate the URL

- If the provided URL is valid and can be reached from titra, the available lists will be retrieved from Wekan. Select the list you want to use as source for time-tracking and click on Save.

- Verify the Wekan integration works by searching for a card in the track time view


OpenID Connect (OIDC) Authentication
- Configure your OIDC client for Authorization Code Flow
- Set the relevant fields in titra

- Client ID: Client ID as per your OIDC App Configuration
- Client Secret: As per your OIDC App Configuration
- OIDC Server Url: Your auth domain e.g. http://auth.your.domain
- Authorization Endpoint: /your/auth/endpoint Note the prepended slash
- Token Endpoint: /your/token/endpoint Note the prepended slash
- UserInfo Endpoint: /your/userinfo/endpoint Note the prepended slash
- Id Token Fields: Extra fields to be grabbed from your token and appended to the user. In my case my server returns an opaque access token which it grabs first (not the id token) so make sure that these fields are on the relevant token.
- Request Permissions: These permissions will be requested from your OIDC server, it defaults to openid,profile,email.
You can disable the default login form to prevent password based logins entirely:
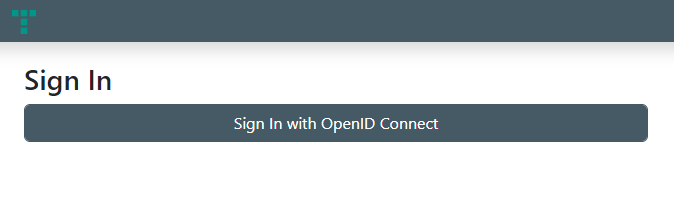
Gitlab OpenID Provider
Example configuration provided by Github user Rishats in issue 171.
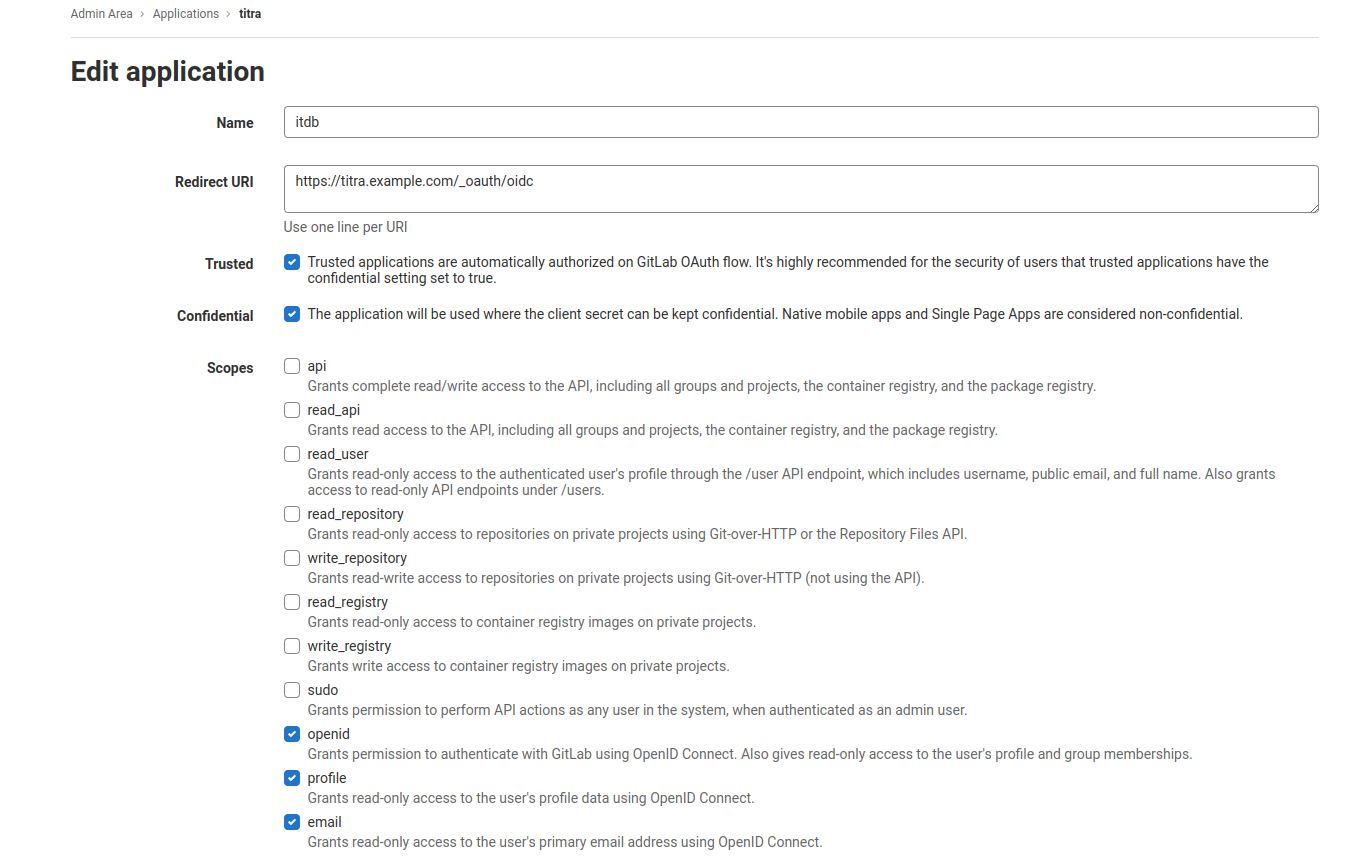
All credit goes to @iamscottcab who has authored this documentation and provided two pull requests to improve the OIDC integration. Also a shoutout to @Rishats for providing the Gitlab example configuration!
API documentation
To use the titra API you need to create an API token first. See user-settings for more information.
Once the setup is complete, the complete titra API documentation can be found at https://titraio.github.io/titra/ .
MongoDB version compatibility
titra is built on Meteor.js which is in turn using the official Node.js MongoDB driver. The official statement regarding compatibility can be found here.
titra will always be updated to the latest Meteor.js version and thus inherits its dependencies.The official MongoDB Node.js driver compatibility is available here.