Administration
- User Administration
- Claiming Admin Rights
- Global Settings
- Environment Information
- Interfaces
- Custom Fields
User Administration
Users can be administered on the administration page accessible through the Users menu.
Existing users can be deleted using the actions column on the far right side. In addition users can be promoted to administrators by activating the corresponding “Admin” checkbox. It is possible to set a user "inactive" by toggling the corresponding checkbox.
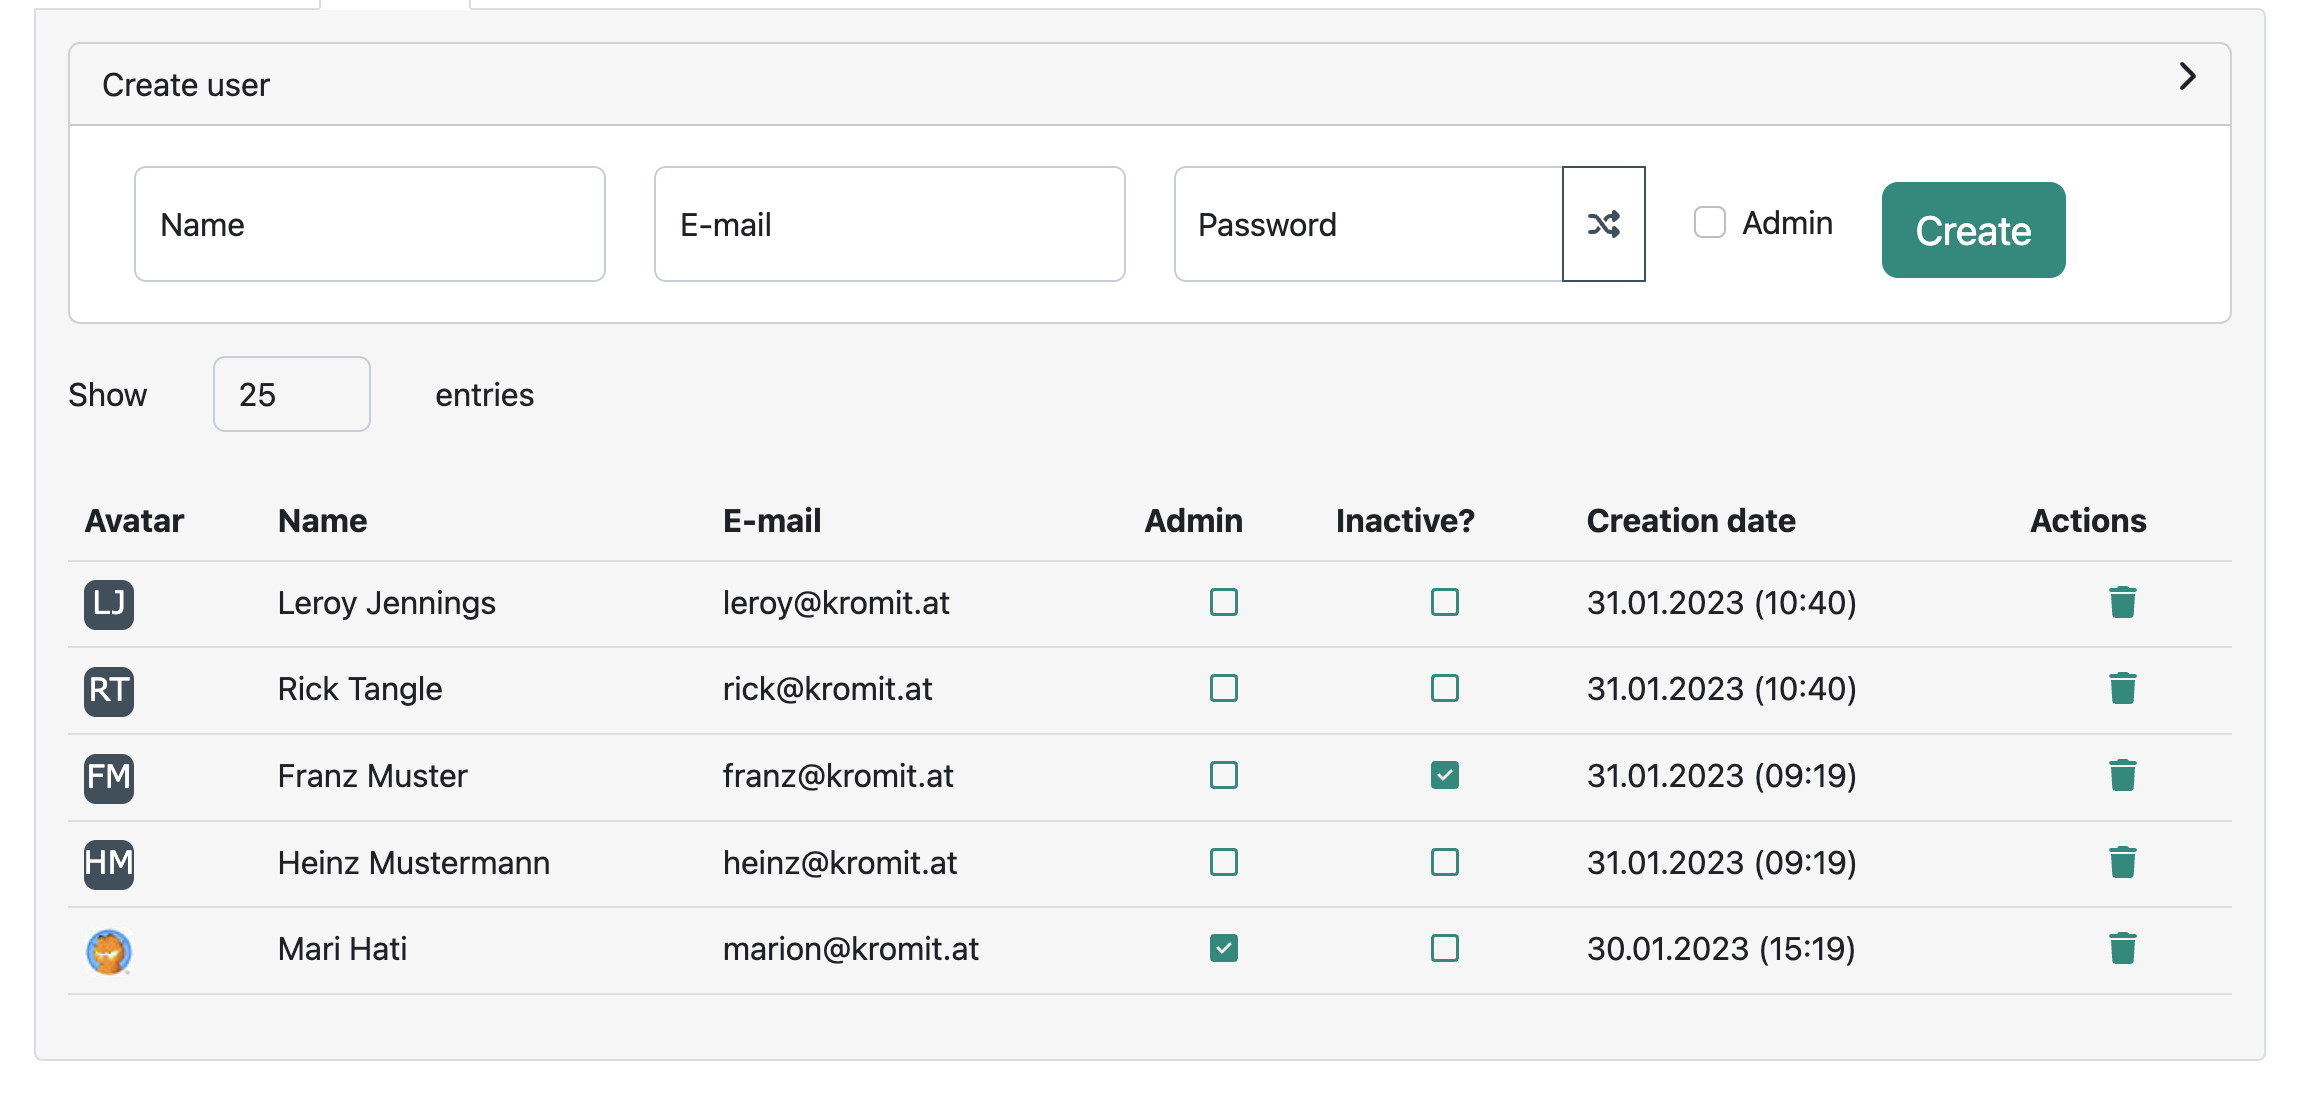
On this page it is also possible to create new users by expanding the “Create user” section:

It is necessary to provide the name, E-mail address and a password for the new user. We recommend to use the random password generator next to the password field to always generate unique new passwords for every new user. By activating the “Admin” checkbox, a new user can instantly be promoted to the administrator role.
Claiming Admin Rights
Administration

By default, no administrator is defined for every new titra instance setup. However, if no administrator is currently defined, every registered user on that instance can manually claim admin rights (first come, first serve). This is done to prevent bots claiming admins rights from newly created titra instances in cloud environments before the owner can do it. Additional users can be promoted to admins using the User administration.
Claim Administrator Rights
If you are a long time titra user (i.e. before version 0.9.X), you might have already registered a user. Or, you might have removed the admin flag from your own user. Luckily, there is a way out of this deadlock – whenever there are no admin users registered on a titra environment, you will be able to (re-) claim admin rights using the relative url /claim/admin. However, if a user tries to claim admin rights when there is already another admin user, the following warning will be displayed:

Global Settings
The titra Global settings (defaults) are available in the user menu > Administration.

All settings are defaults which can be overruled by user specific settings. They can be currently either of type Number or String. No validation of values is taking place so it is up to the administrator to use proper values.
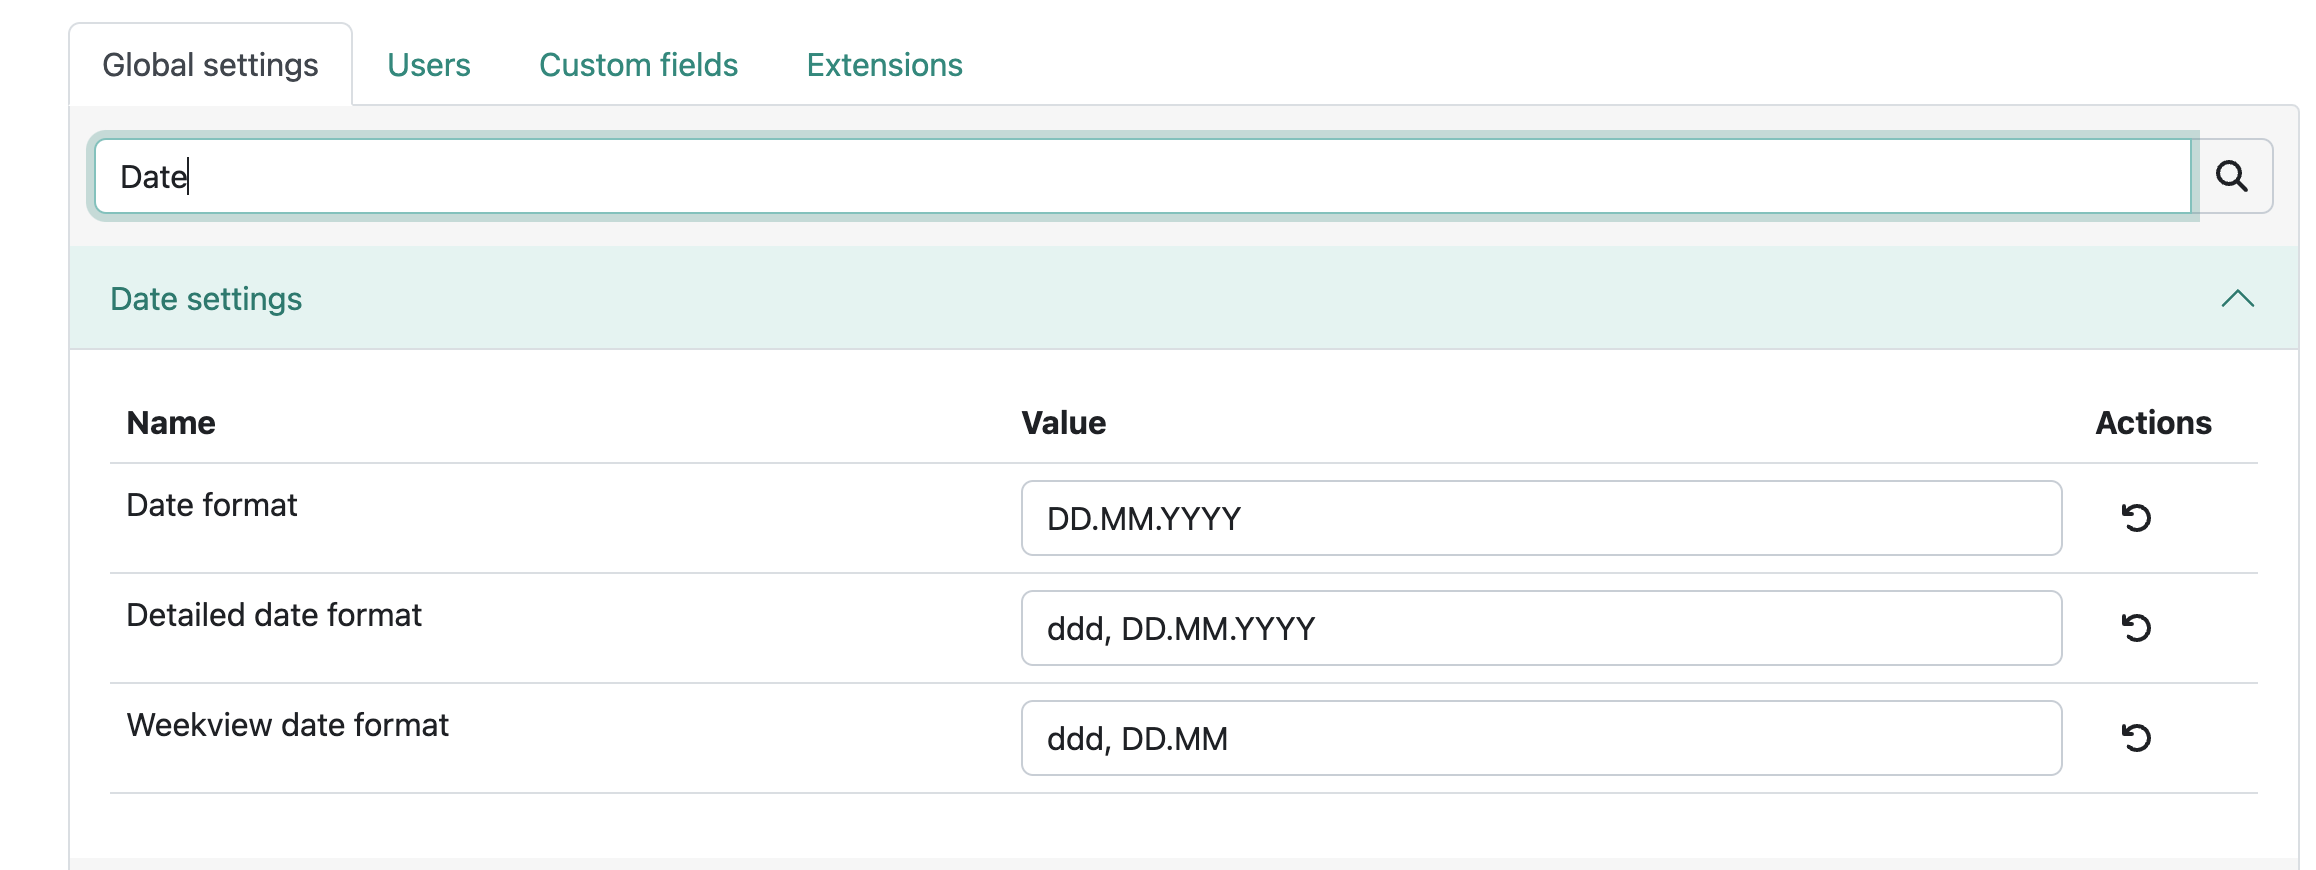
The Search bar
By entering a request in the search bar, in this example "Date" the corresponding Settings-Block is displayed:
Customization Settings
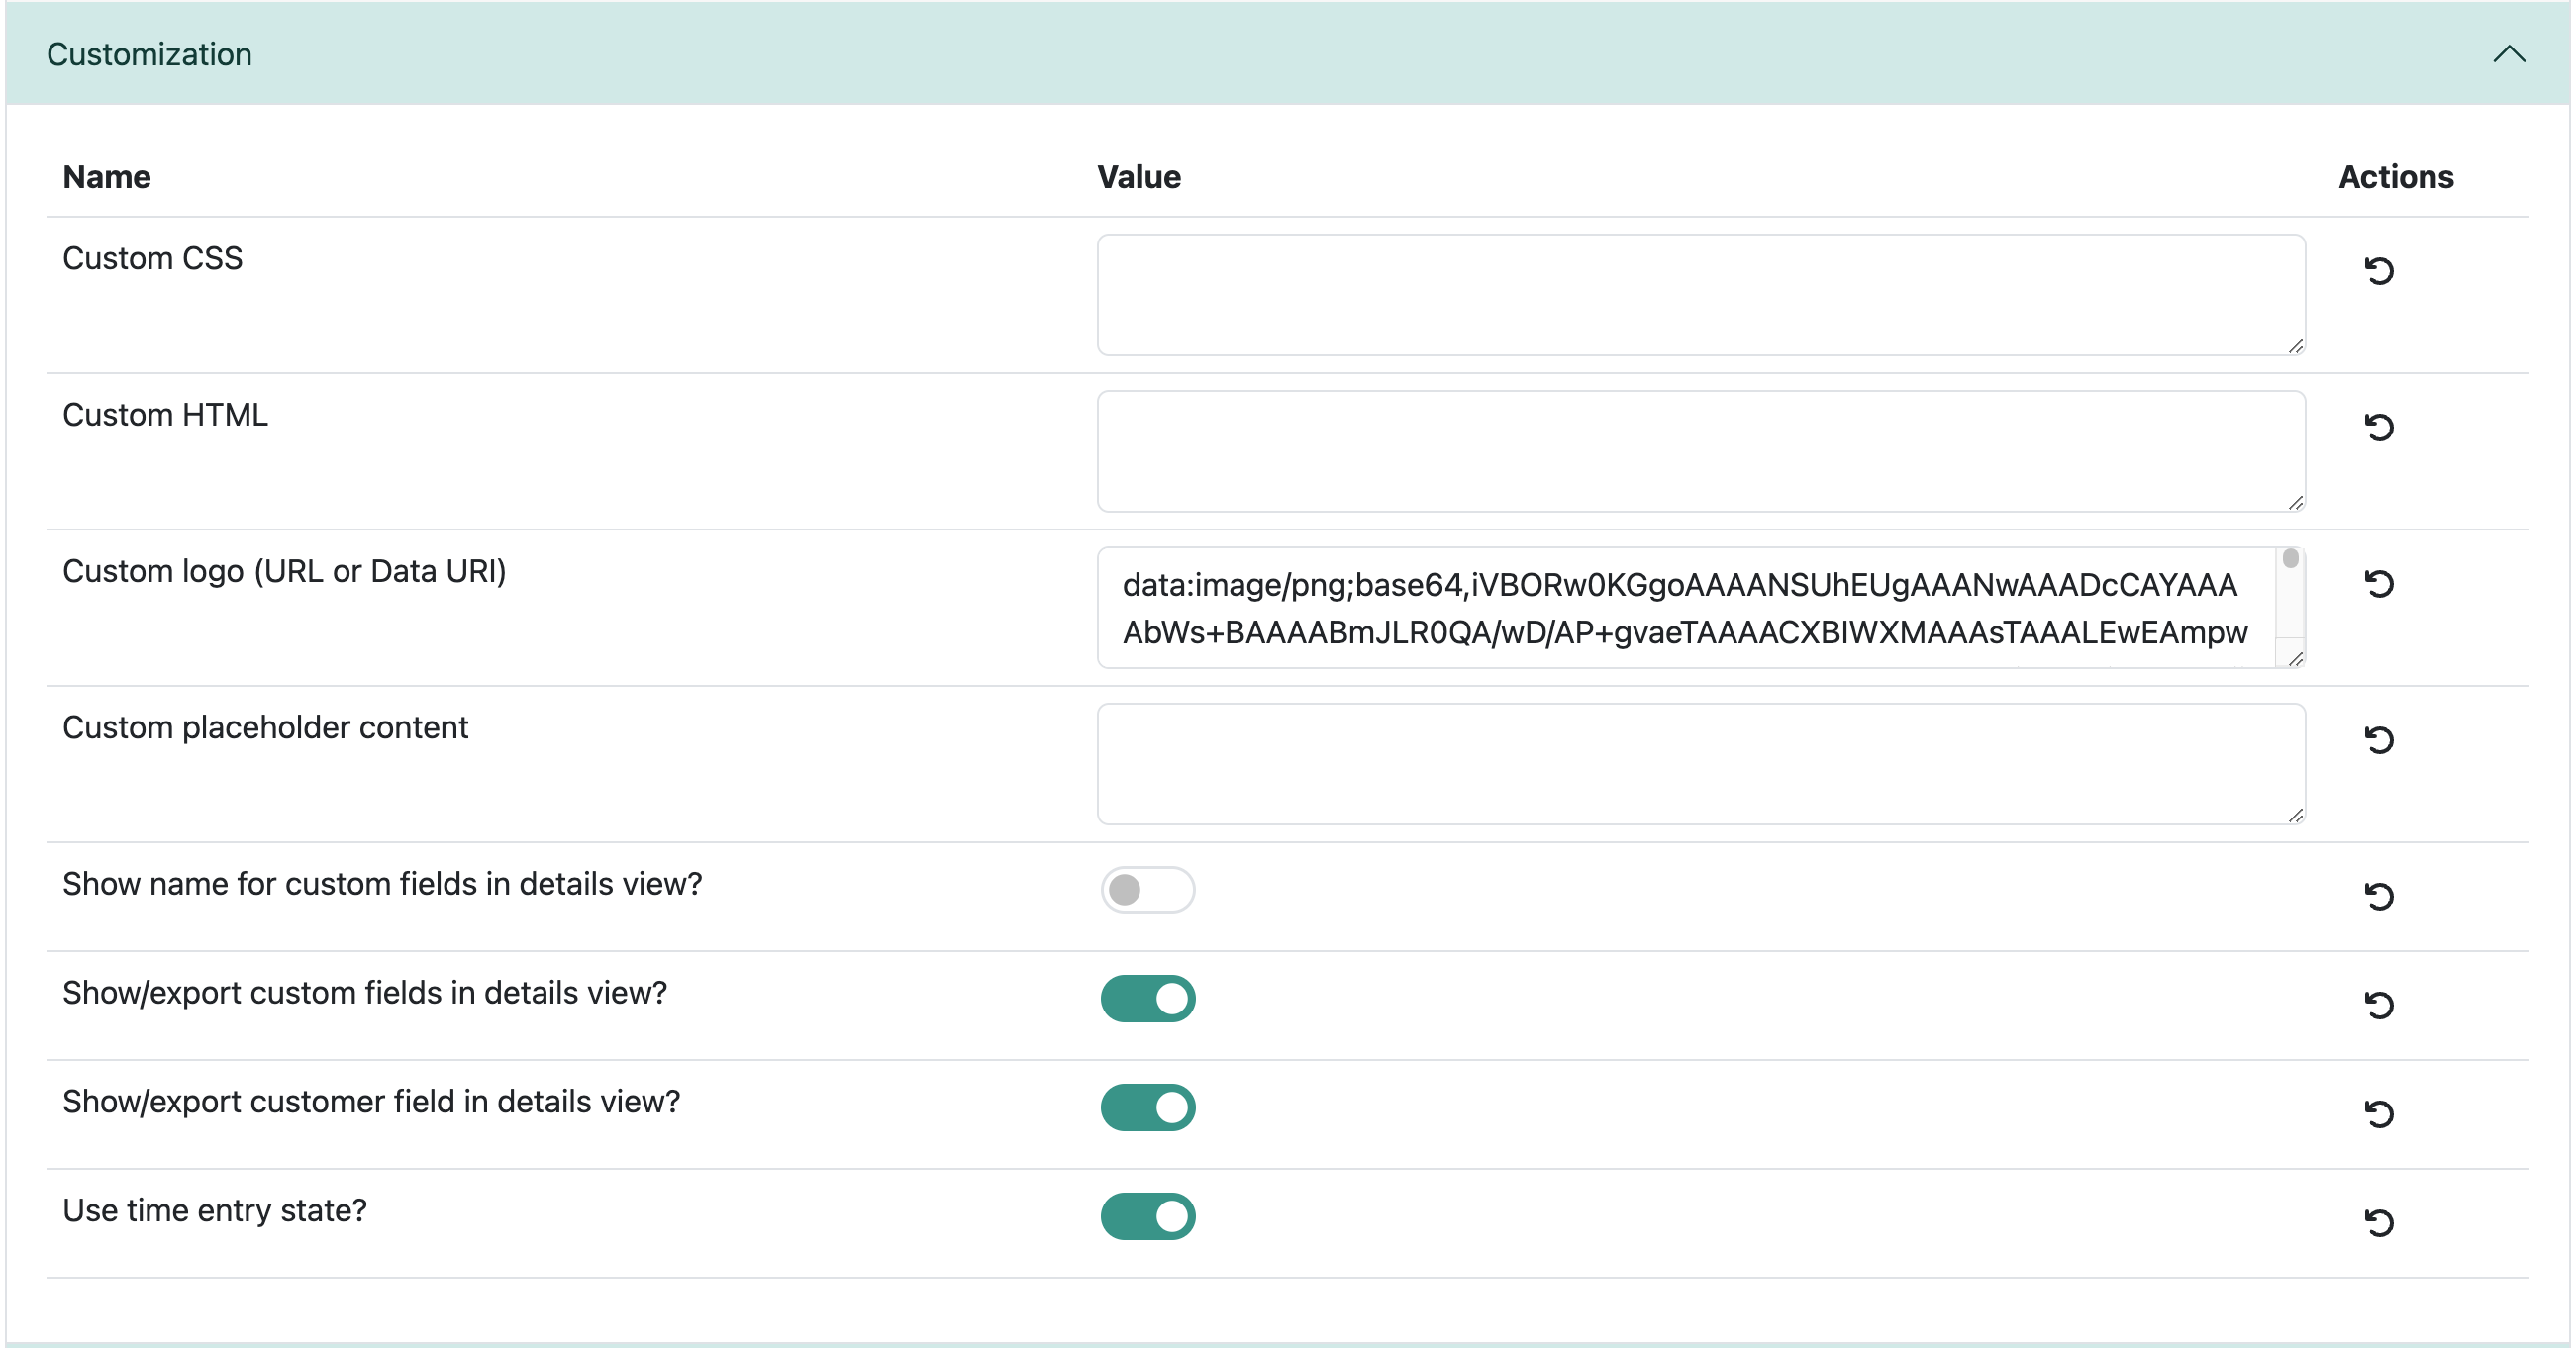
Here the admin can customize several settings, for example it is possible to integrate Custom CSS or HTML Data.
The Custom logo setting allows an admin to provide a URL or Data URI to replace the default titra logo, an example is depicted in the screenshot above.
Inserting a Custom Place Holder Content, will use the specified place holder content on the overview page in a dedicated card underneath "All projects".
This setting is followed by 4 Options that can be turned on/off by the toggle (grey = off, green = on)
If you wish to reset a single input, clicking on the reset button in the desired line, will do the trick:
Date Settings
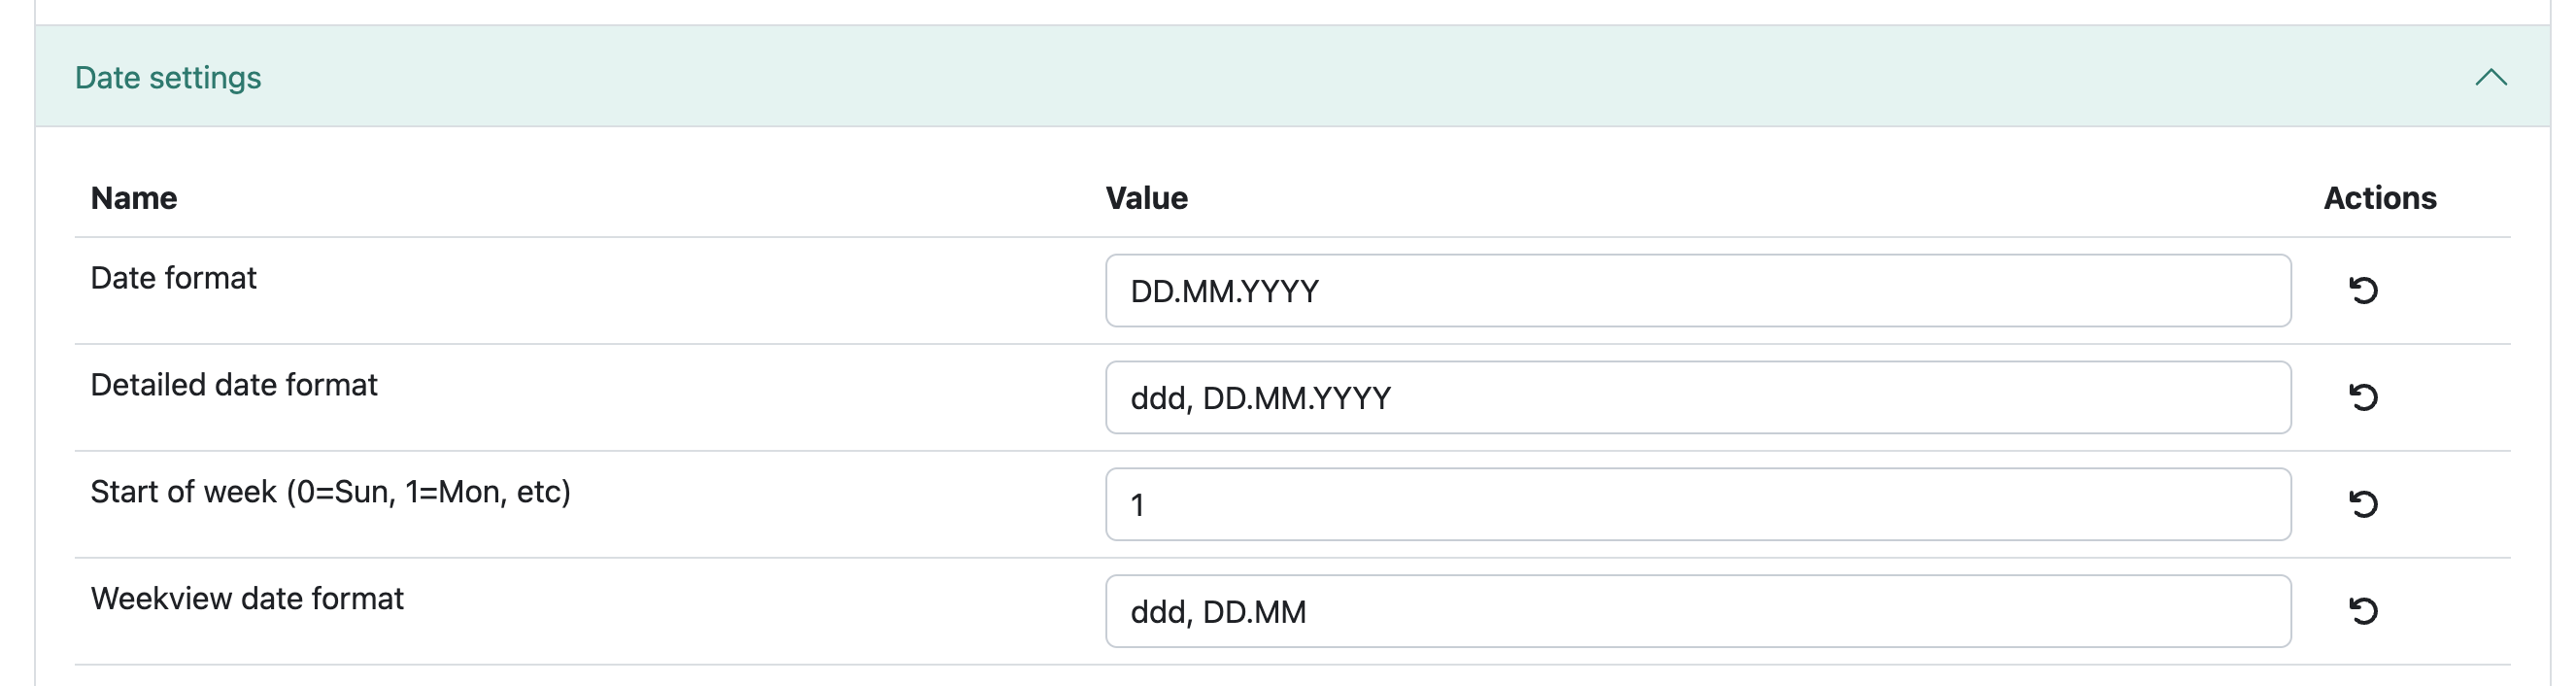
This will setup the default data shown in the users titra. See the following point, for all formatting options:
Date formats
titra uses dayjs under the hood and thus supports all formatting options listed in the Format (opens in a new tab)” rel=”noreferrer noopener” class=”rank-math-link”>Display > Format section.

The mail addresses can be configured under this setting option.
Globals

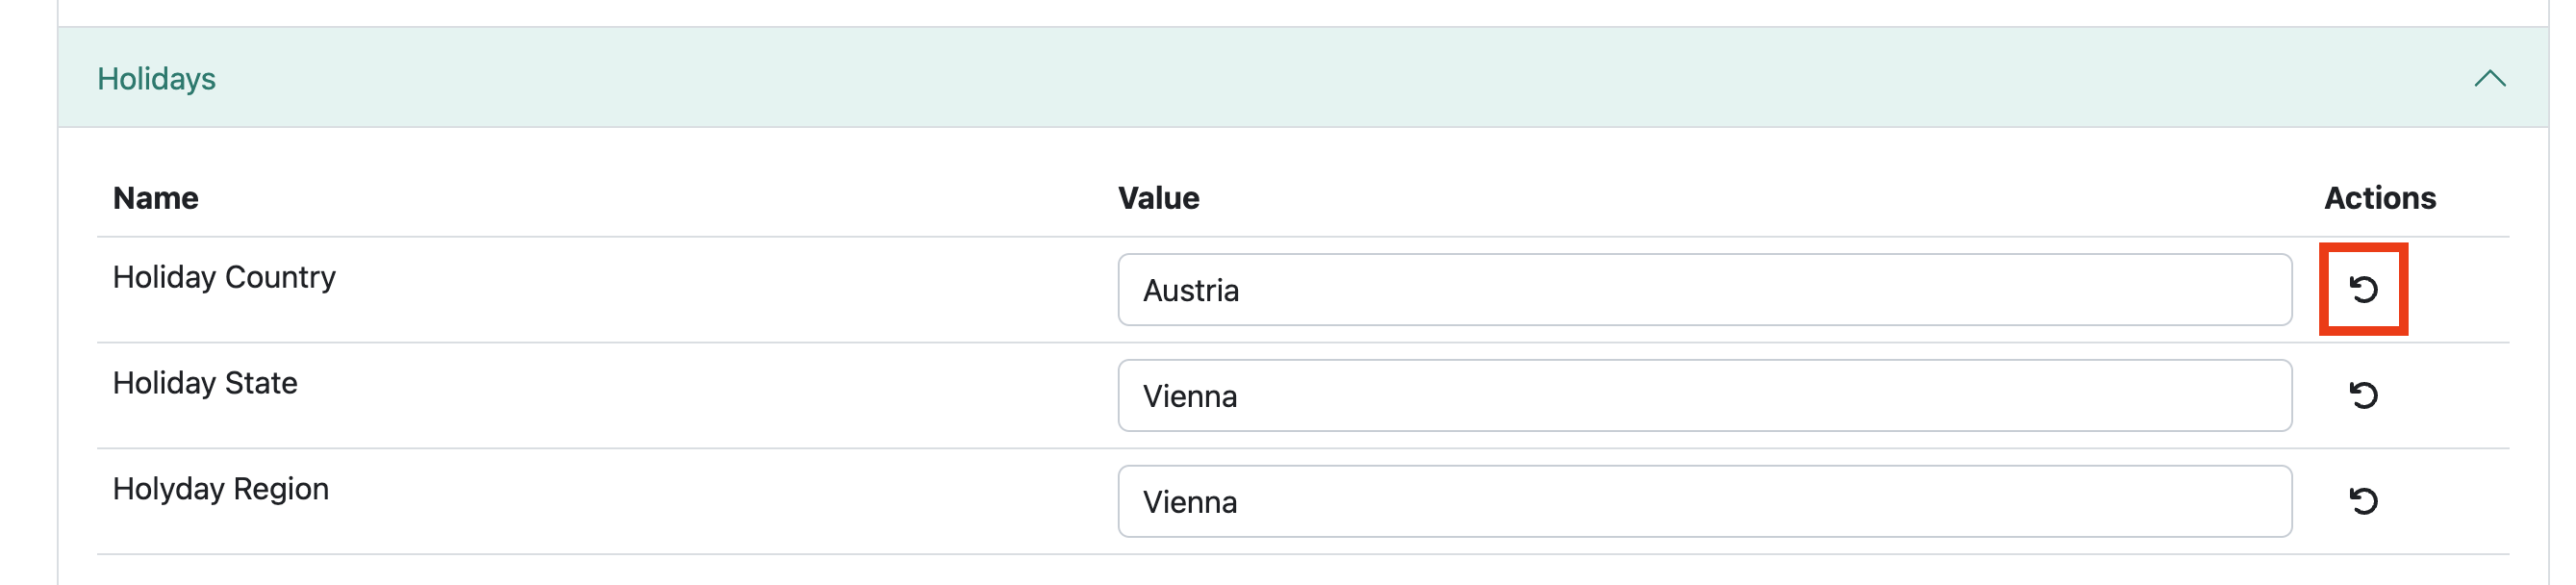
Holidays

These fields are filled in with the legal holidays of the country, the users are working in, they should be filled in accordingly by the administrator.
Interfaces
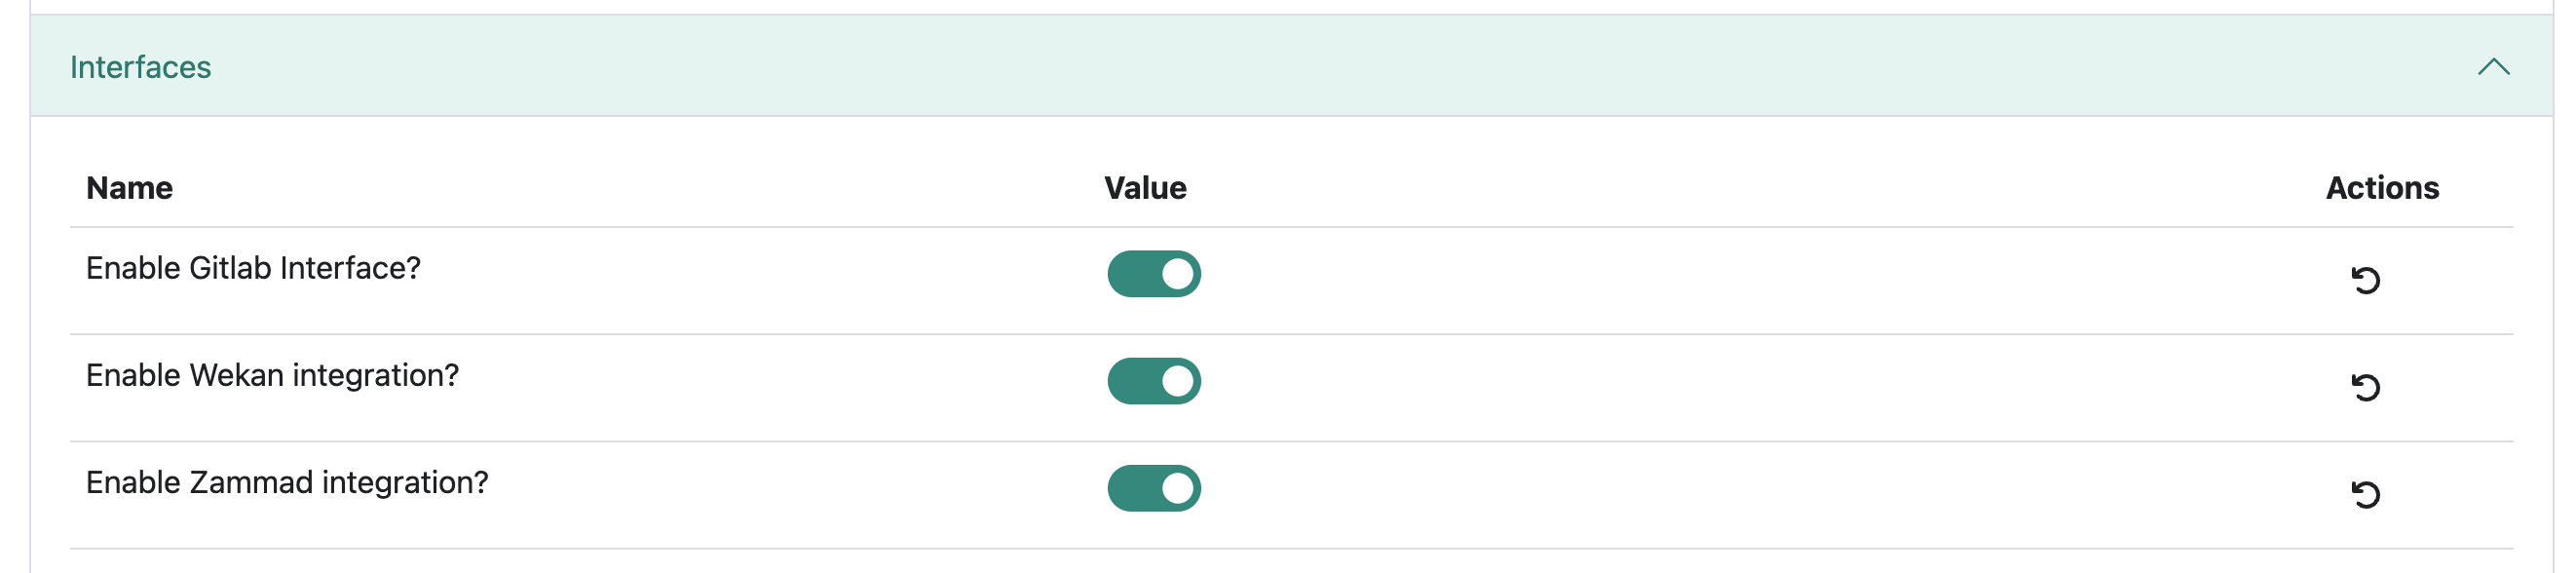
Here the different Interface Integrations can be toggled on and off.
How to set up the different Interfaces can be found here: Gitlab, Zammad, Wekan.
Login
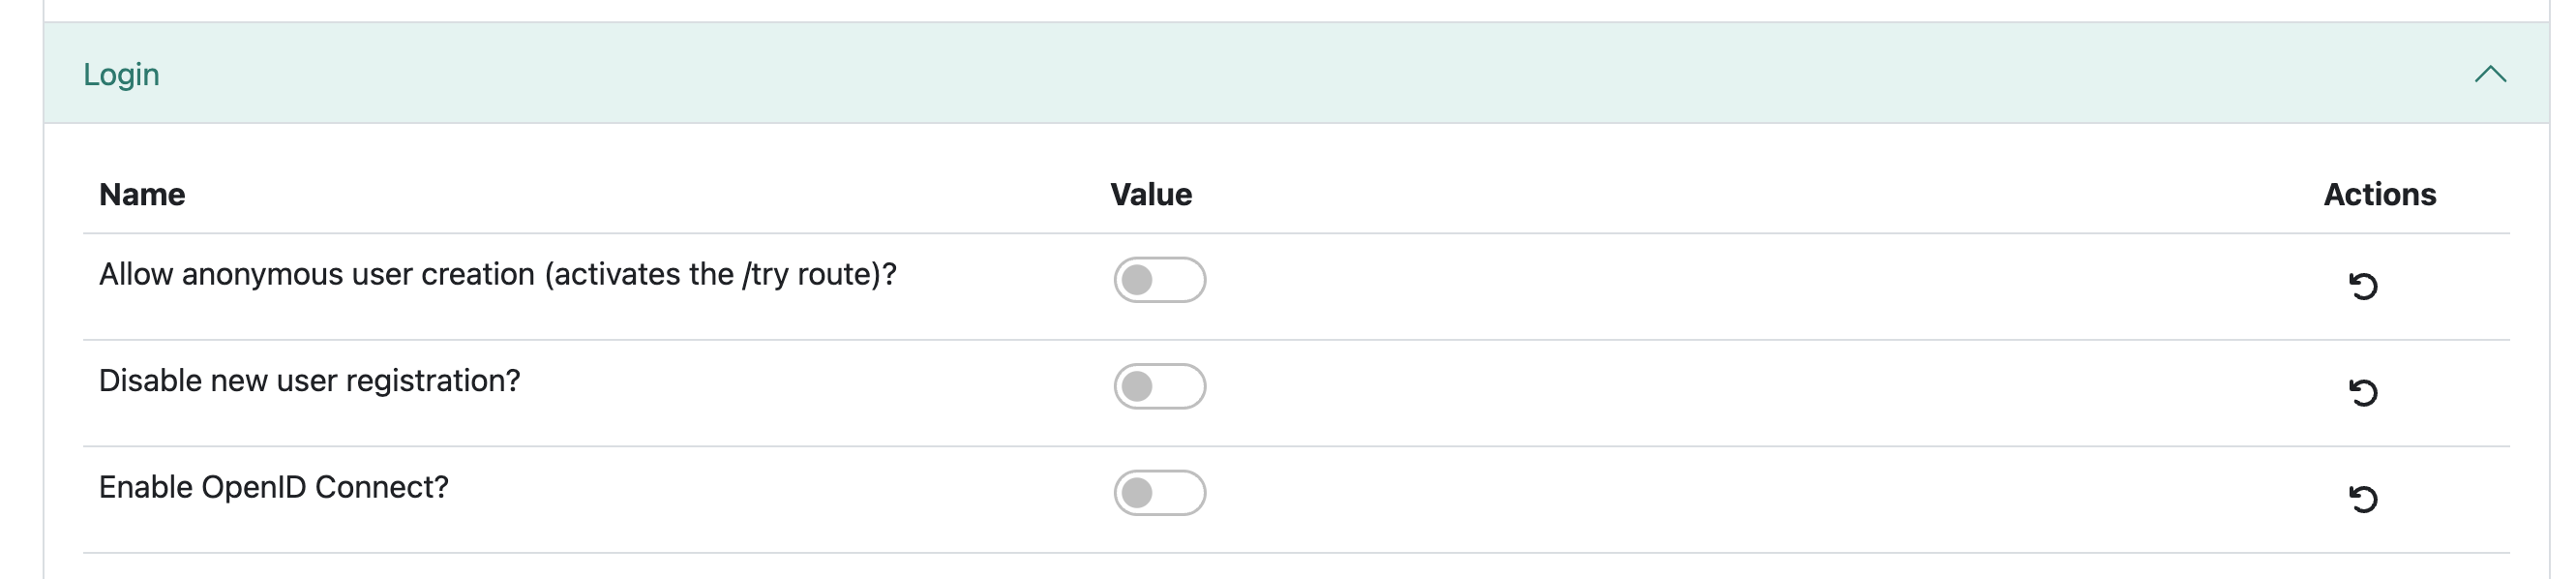
Login specifics are configured in this section. -> --------- -<
Security

The X-Frame-Options HTTP response header can be used to indicate whether or not a browser should be allowed to render a page in a <frame> , <iframe> , <embed> or <object>. Use this to avoid click-jacking attacks, by ensuring that their content is not embedded into other sites.
https://developer.mozilla.org/en-US/docs/Web/HTTP/Headers/X-Frame-Options?retiredLocale=de
Time tracking
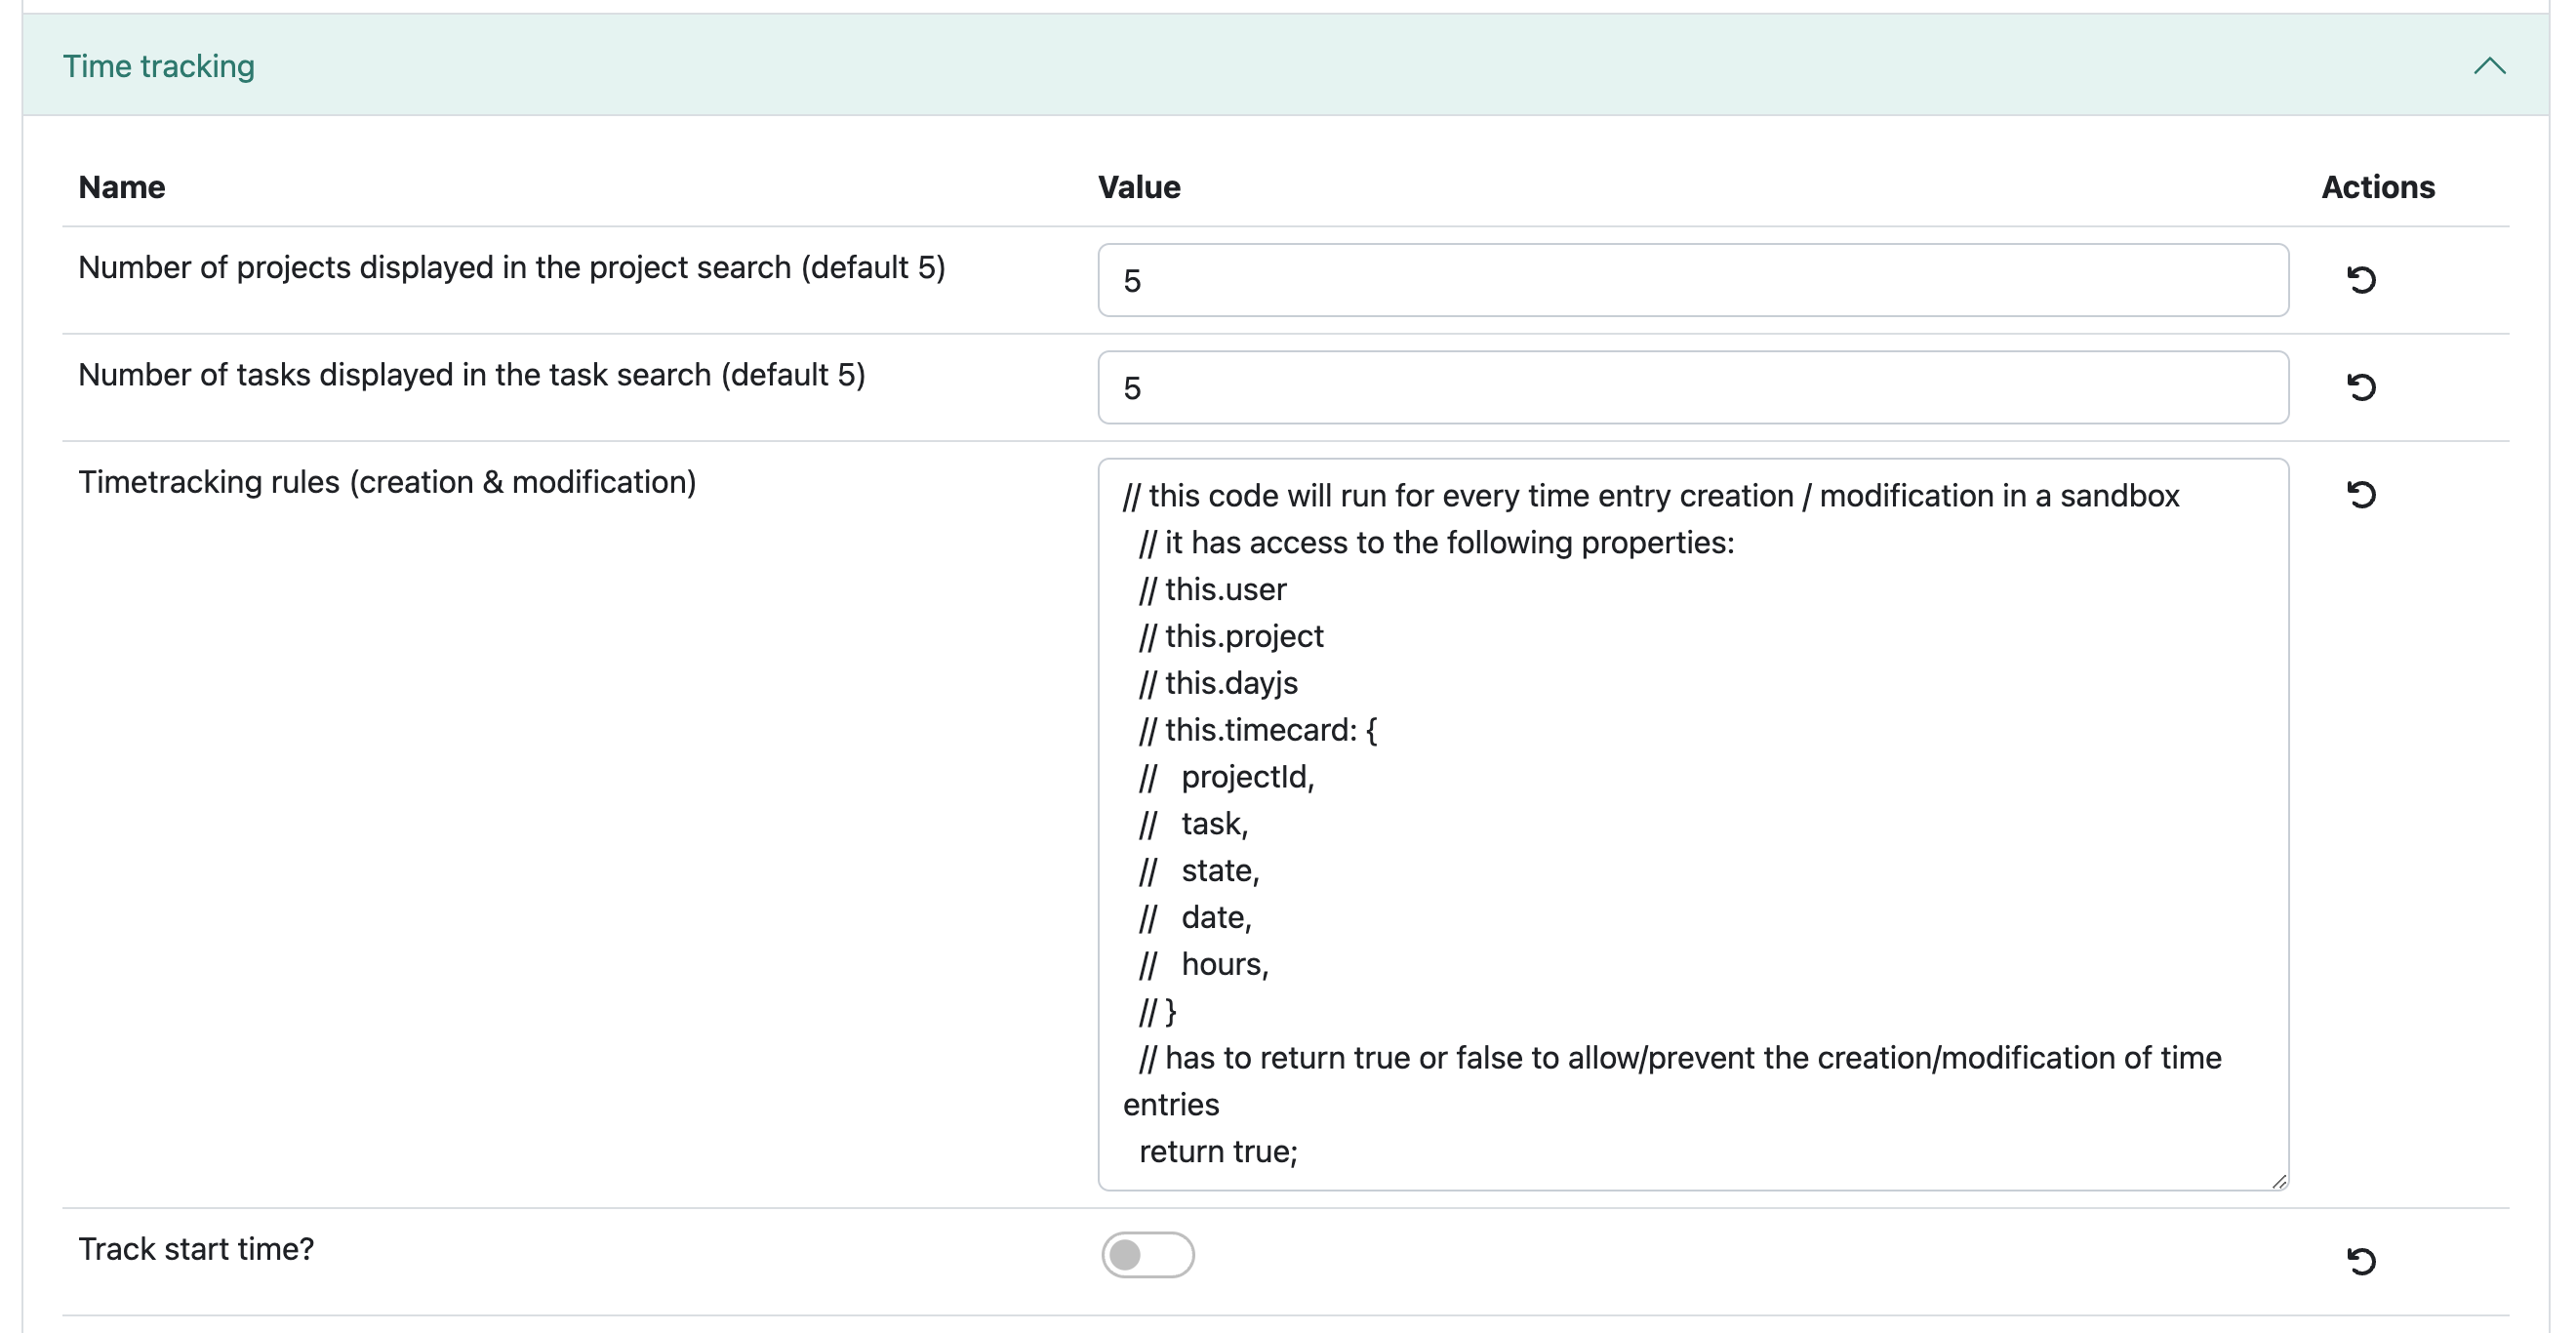
Admins can change the number of projects/tasks displayed in the project/task section (default is 5).
The timetracking rule for creation and modification is set to true by default.
Theres also an option to Track the start time of users.
User defaults
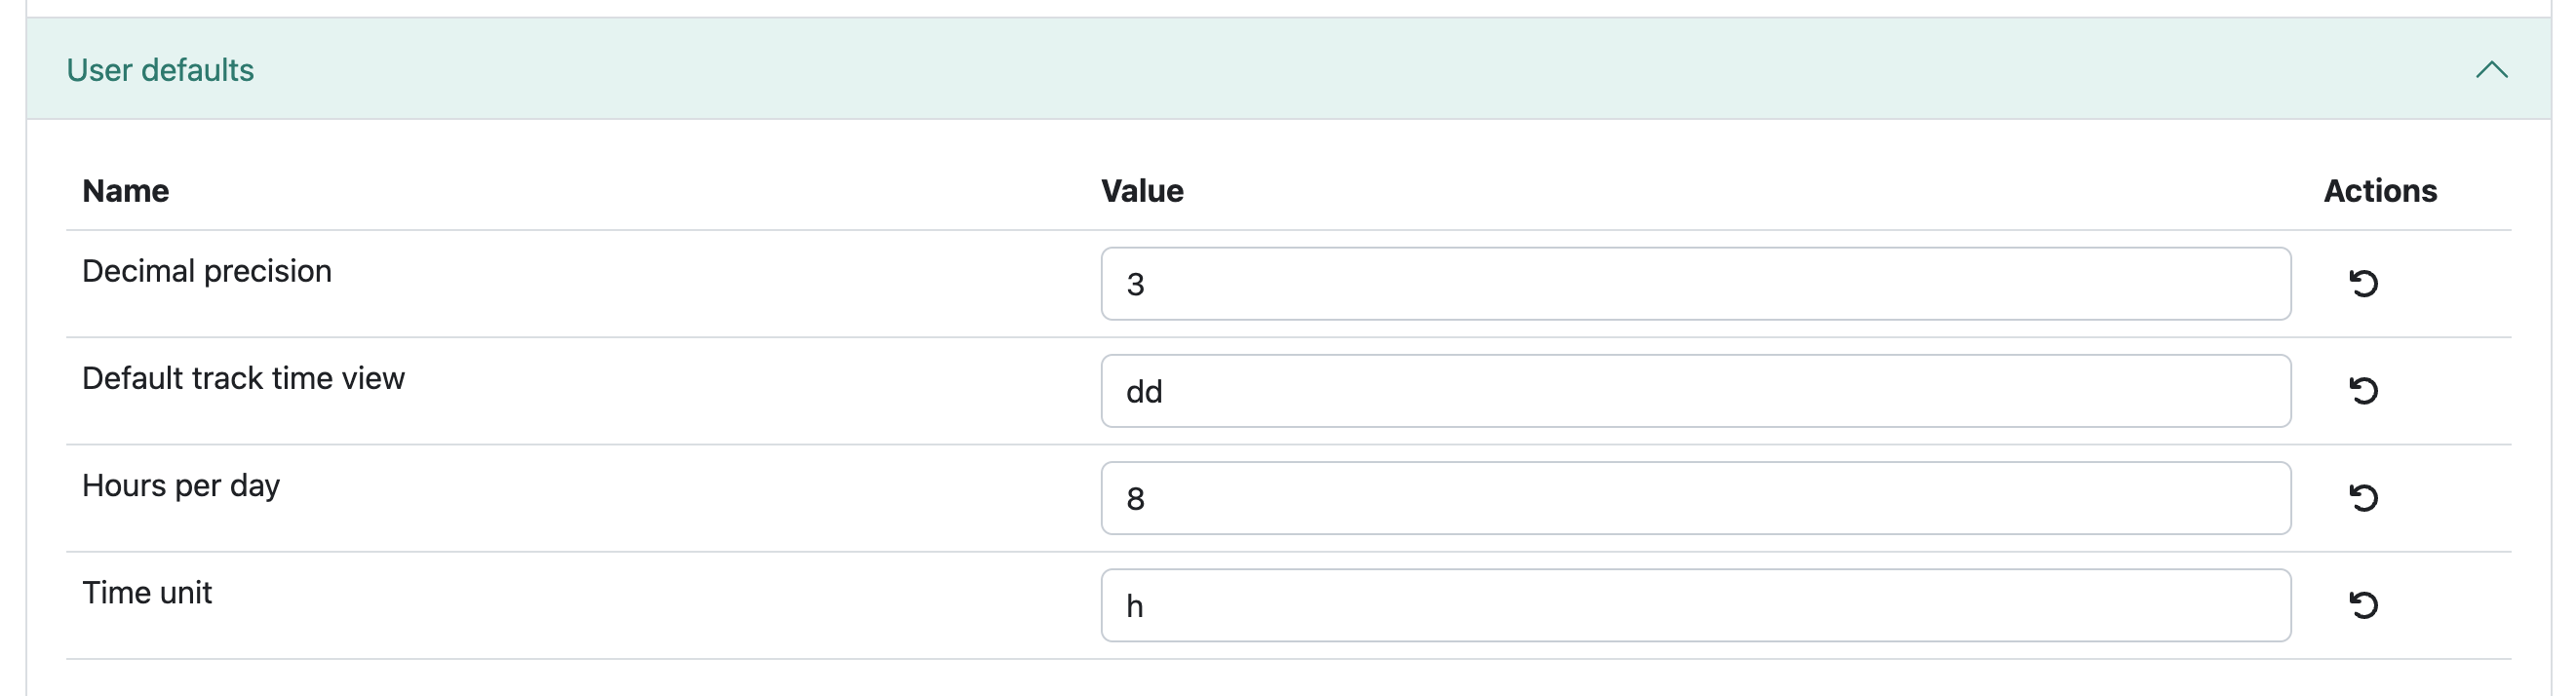
User default settings can be customized in this section, see the following link for format options: Date formats
Workingtime view defaults
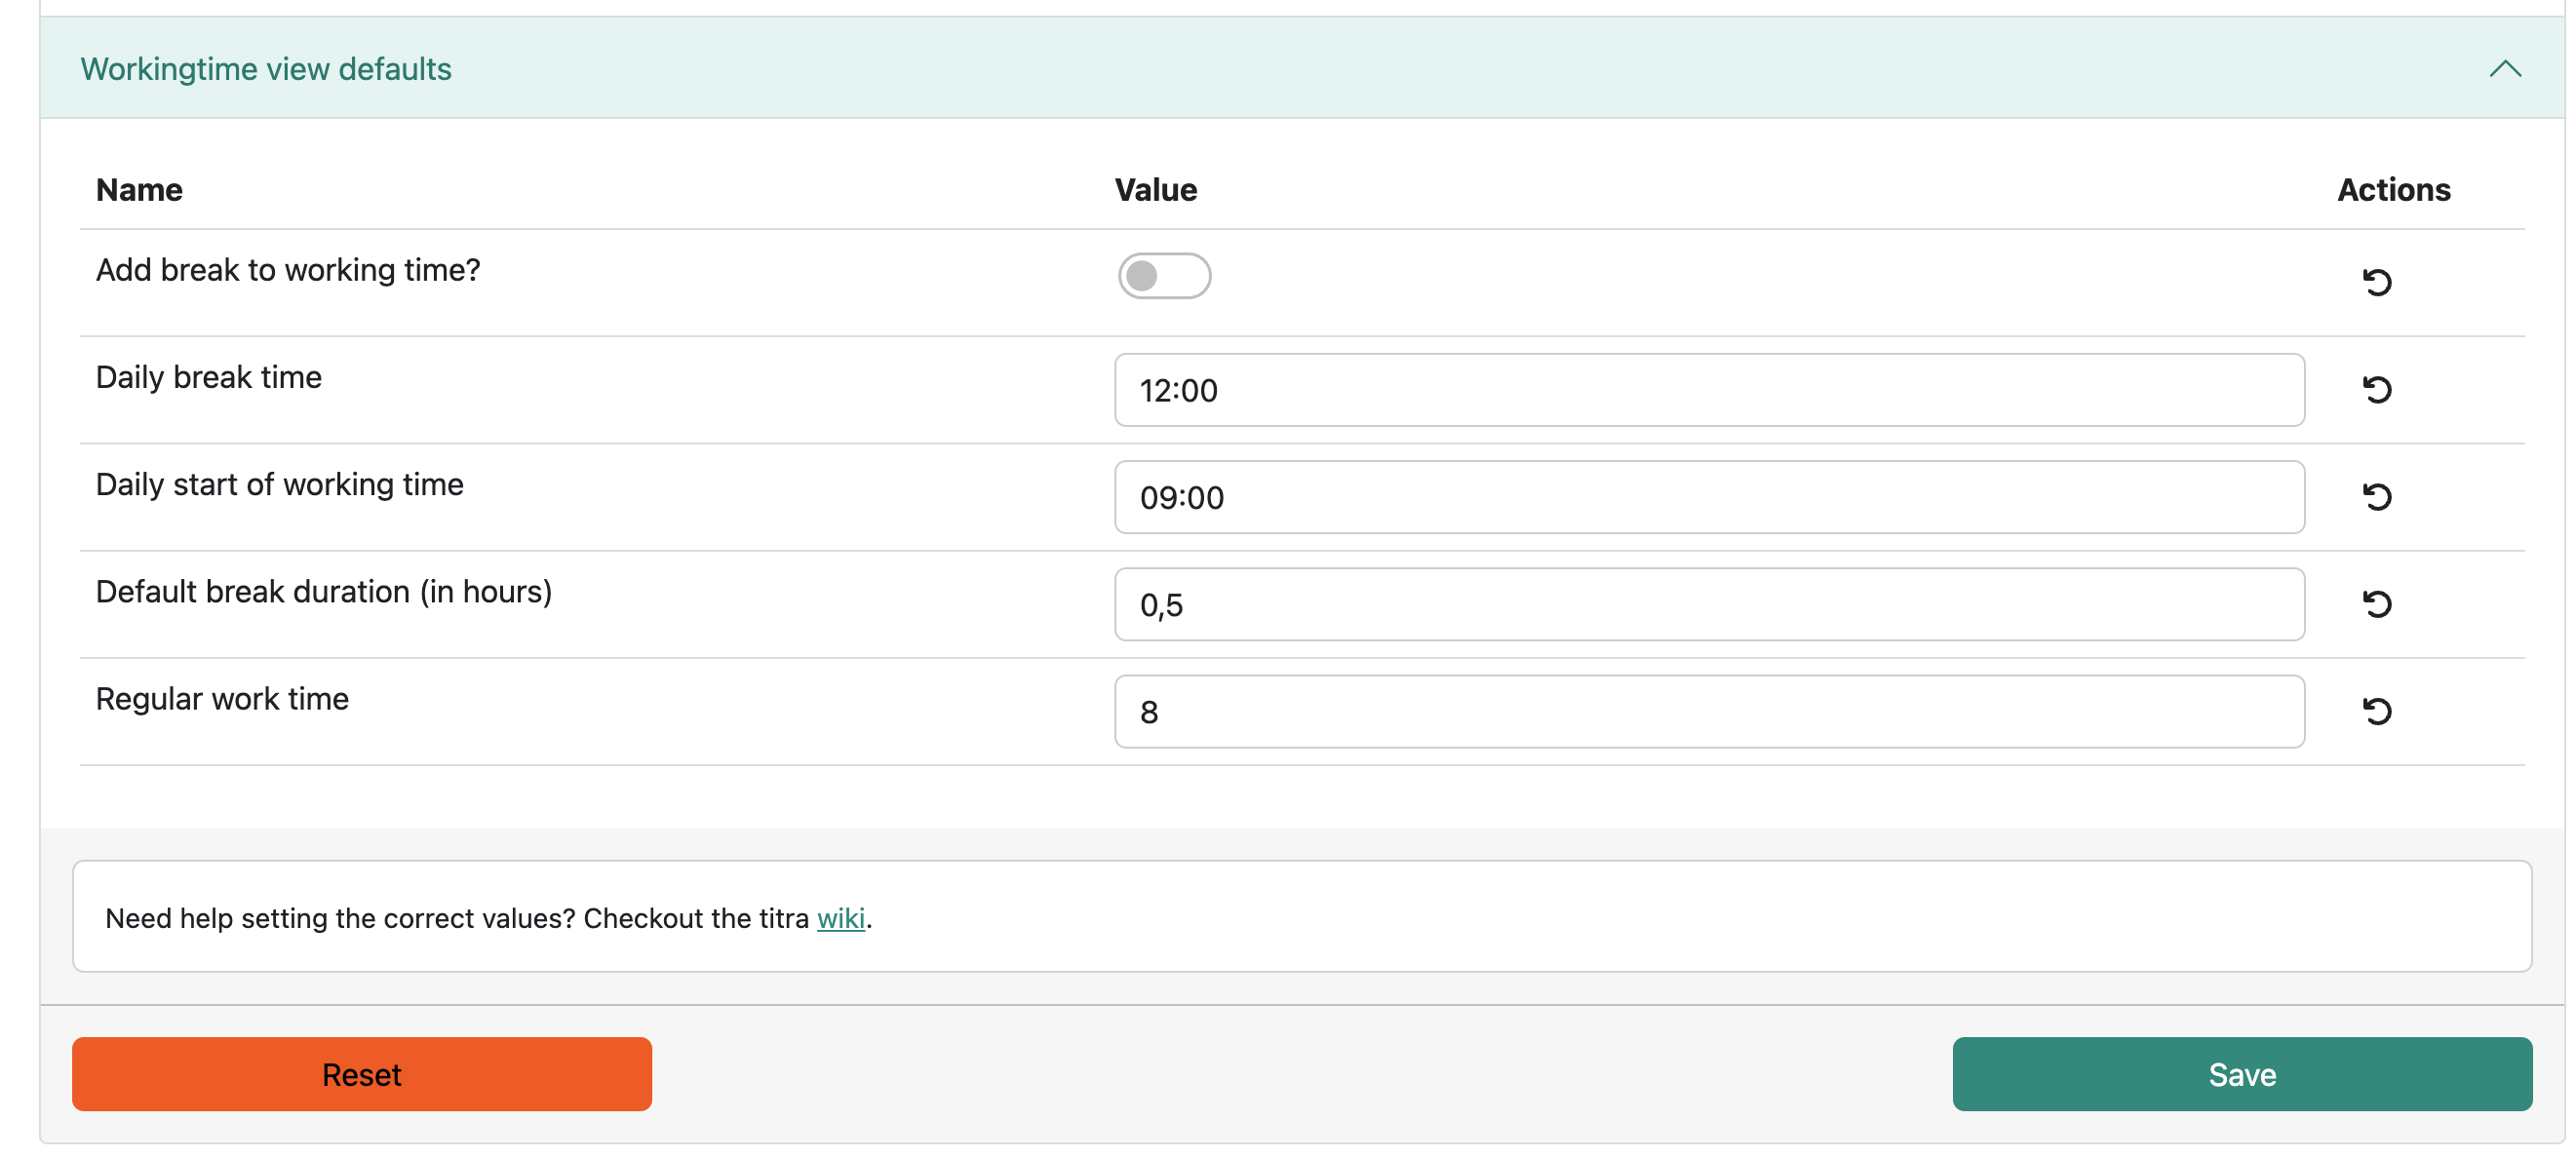
This last configurable section deals with the working time view default settings. Seen above are the default values, these can be changed by the administrator to better fit the users working and break times.
It is always possible to revert back to the default values using the “Reset” button.
Do not forget to save changes made by clicking the "Save" button before exiting the administration page.
Environment Information
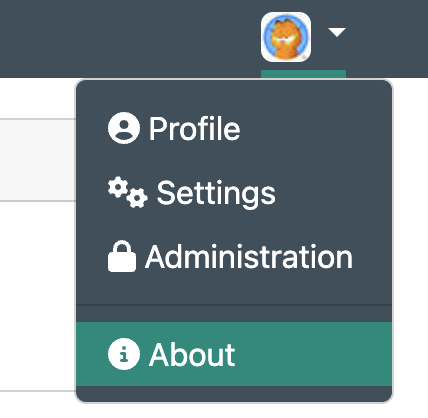
Users with the administrator role can view interesting information about the host environment using the About page in the user menu:
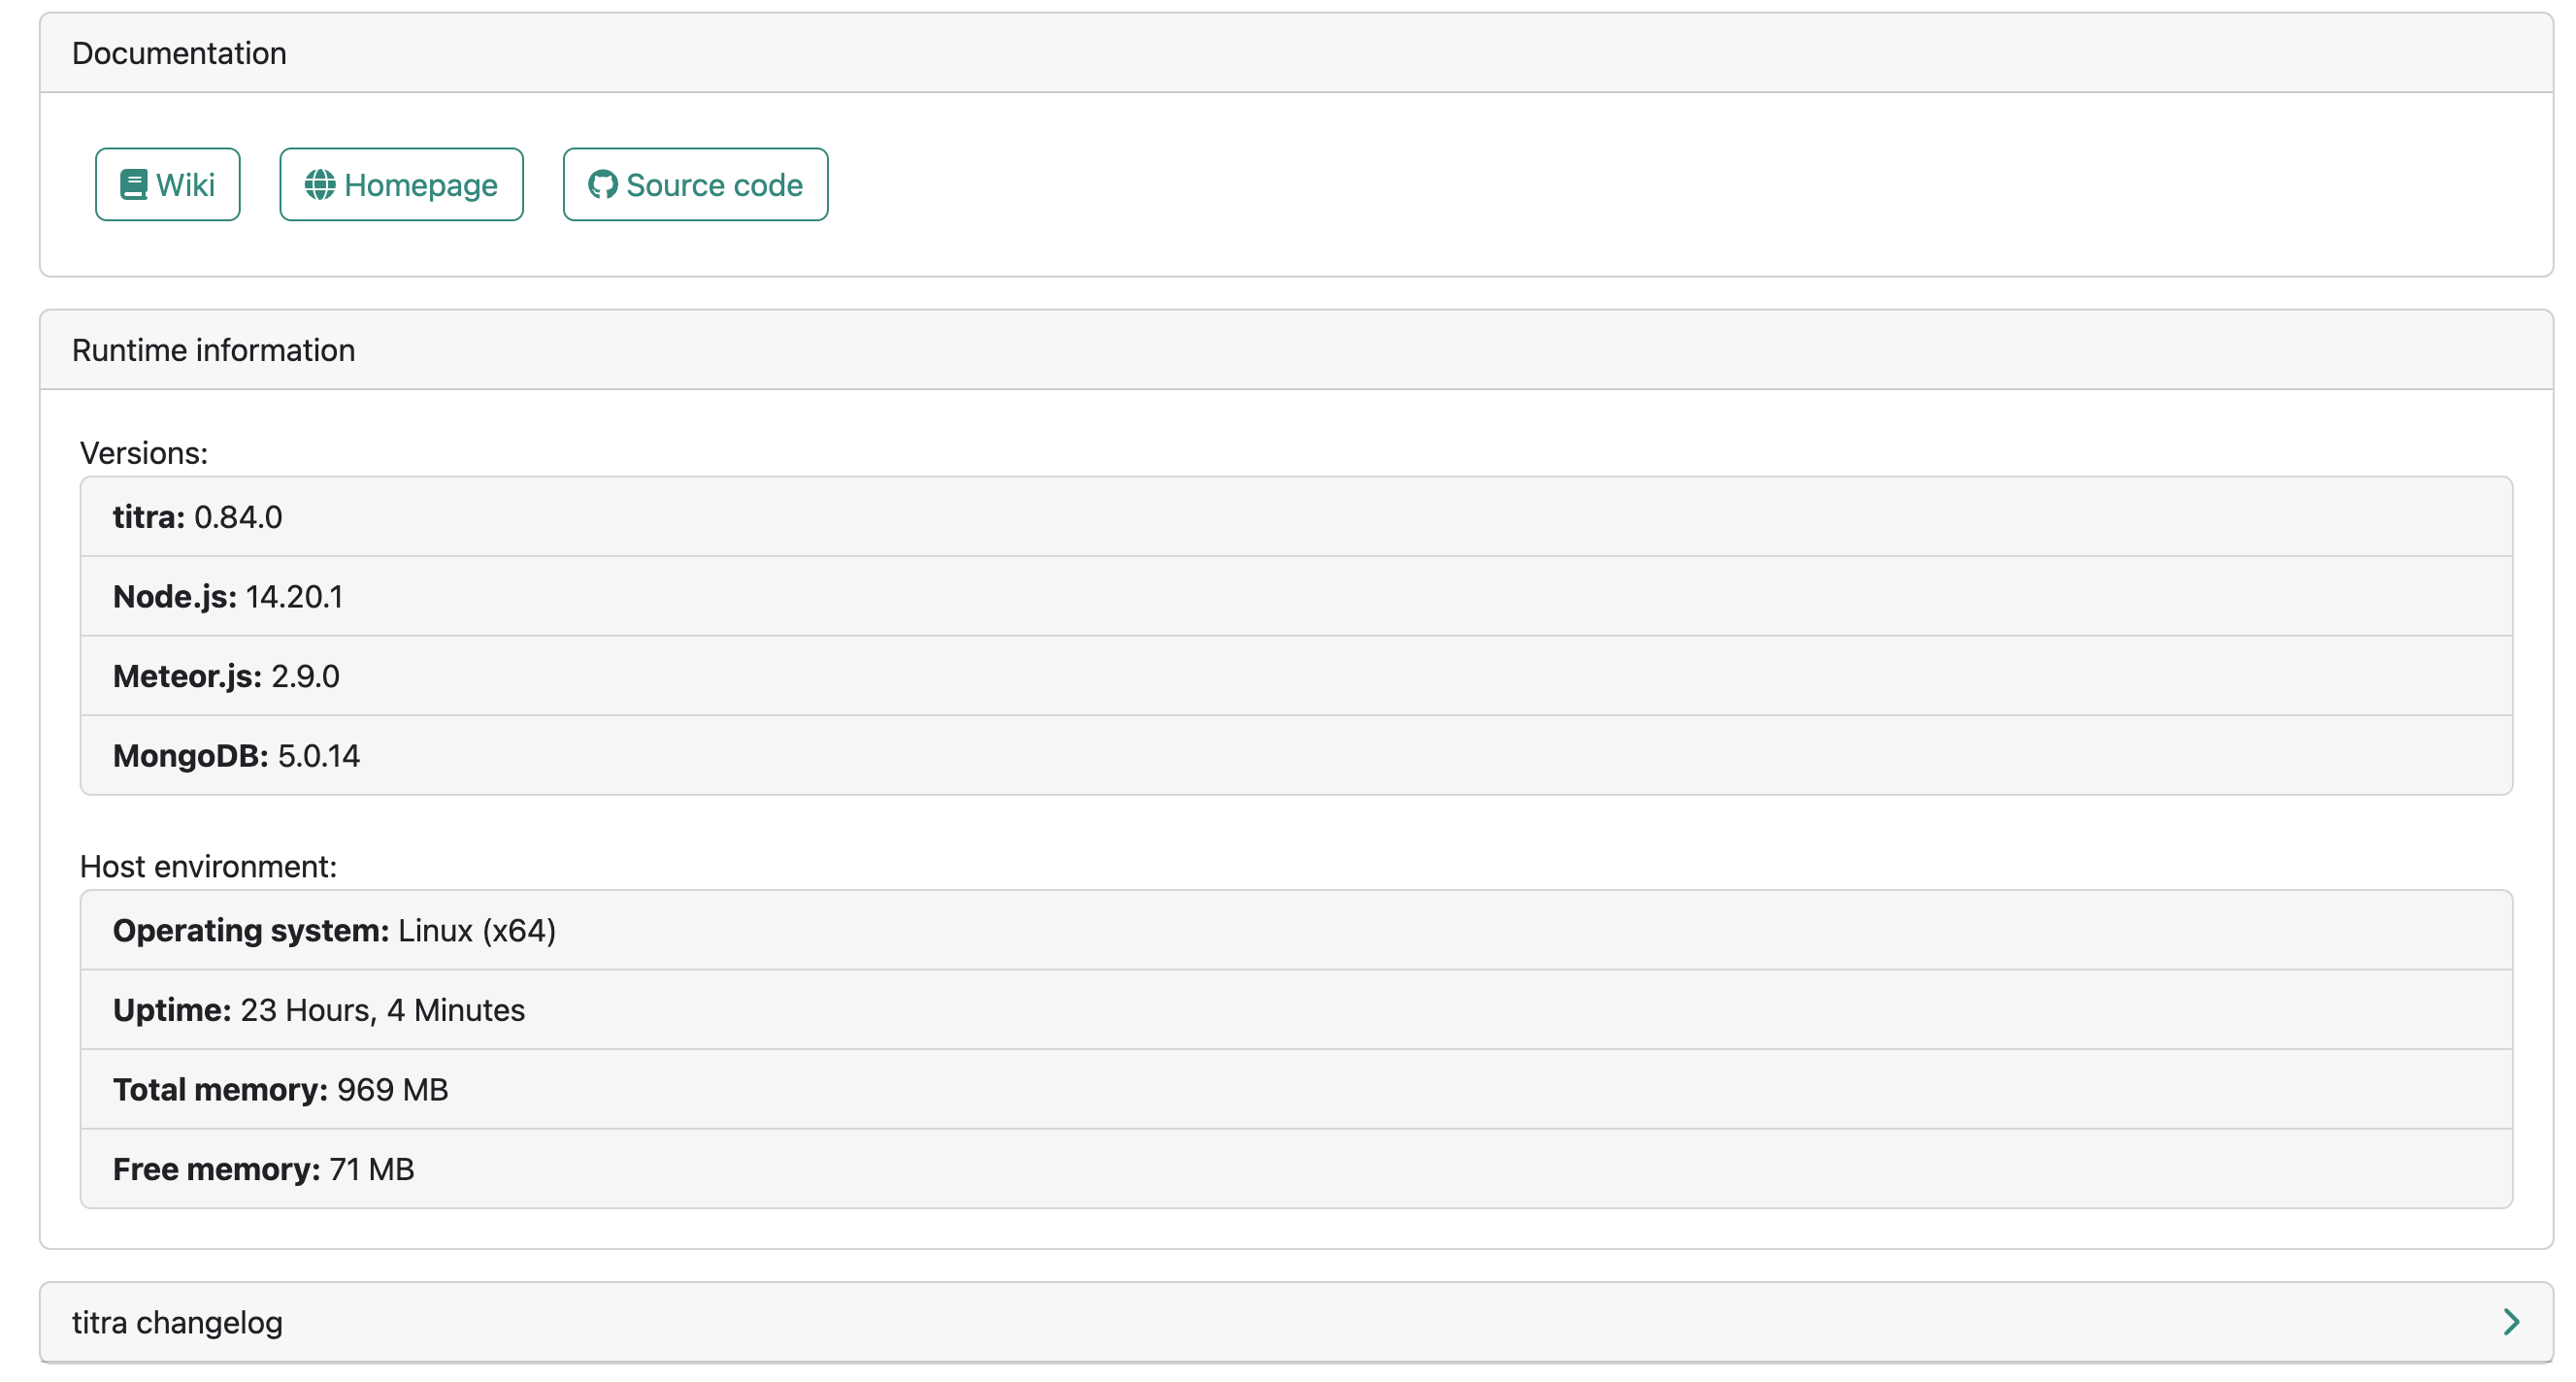
Under the option 'titra changelog' you can display more details about the current version:
This information includes the runtime information of the software used (versions) as well as information about the operating system, uptime and total/free memory. The titra changelog can be retrieved on demand directly from GitHub to stay up to date with the latest developments/releases of titra.
Pro tipp: if you care about performance, make sure that (OpLog enabled) is displayed next to the MongoDB version. If this is not the case you can for example refer to this guide.
@faburem
Interfaces
Siwapp Invoice Export
Zammad Ticket Import
Wekan Kanban Board Cards Import
GitLab Issues Import
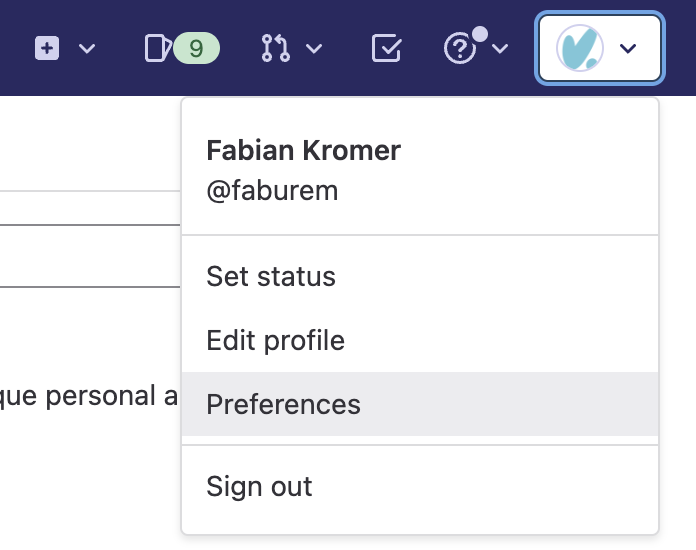
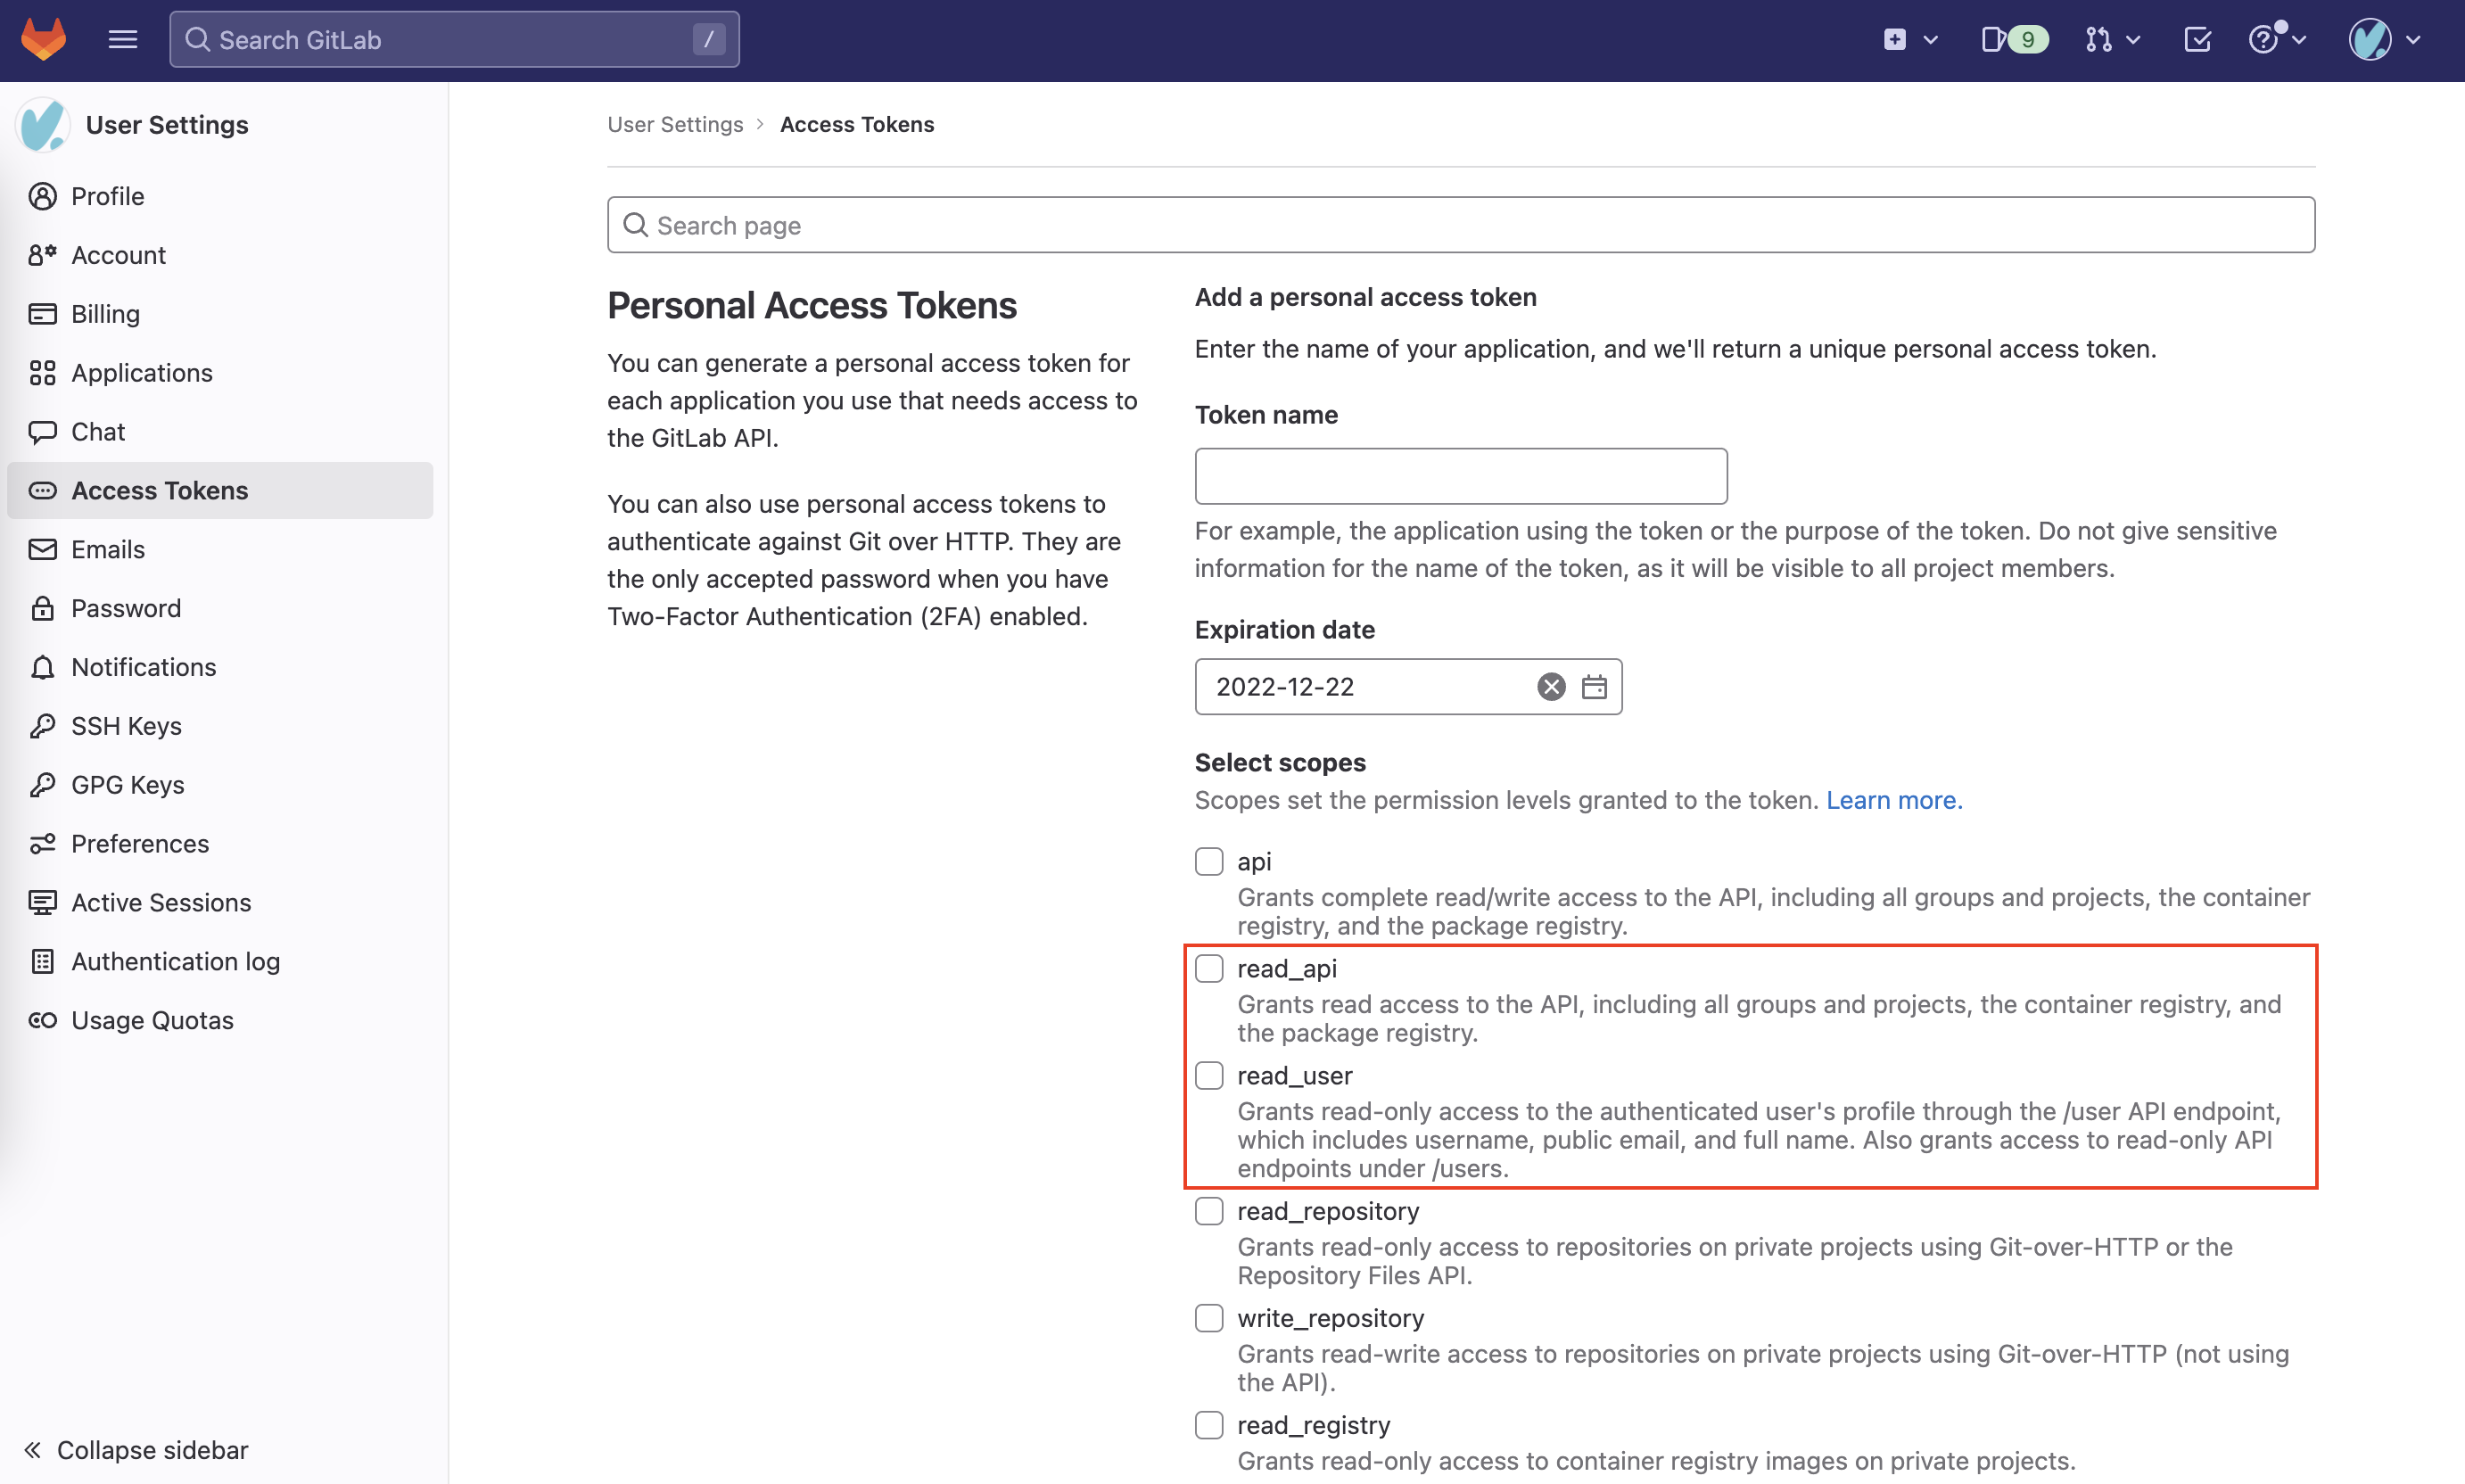
Titra requires an API token for GitLab which can be created in the top right user menu and selecting the Preferences entry:
In the User Settings, navigate to Access Tokens and create a new Personal Access Token. Titra requires one of the scopes read_api or read_user. Both will work but obviously offer different degrees of access rights in regards to issue data.
After the API token has been created, it can be added in titra in the Settings menu.
At the bottom, in the "Integrations" section, the GitLab Instance URL (e.g. https://gitlab.com/) can be specified along with the GitLab API token created before.

The GitLab interface is working for both self-hosted and SaaS versions of GitLab, for self-hosted instances make sure the CORS headers are set properly to allow API connections from your titra host.
Custom Fields
In the Custom fields page of the Administration menu, new custom fields can be created by the administrator.

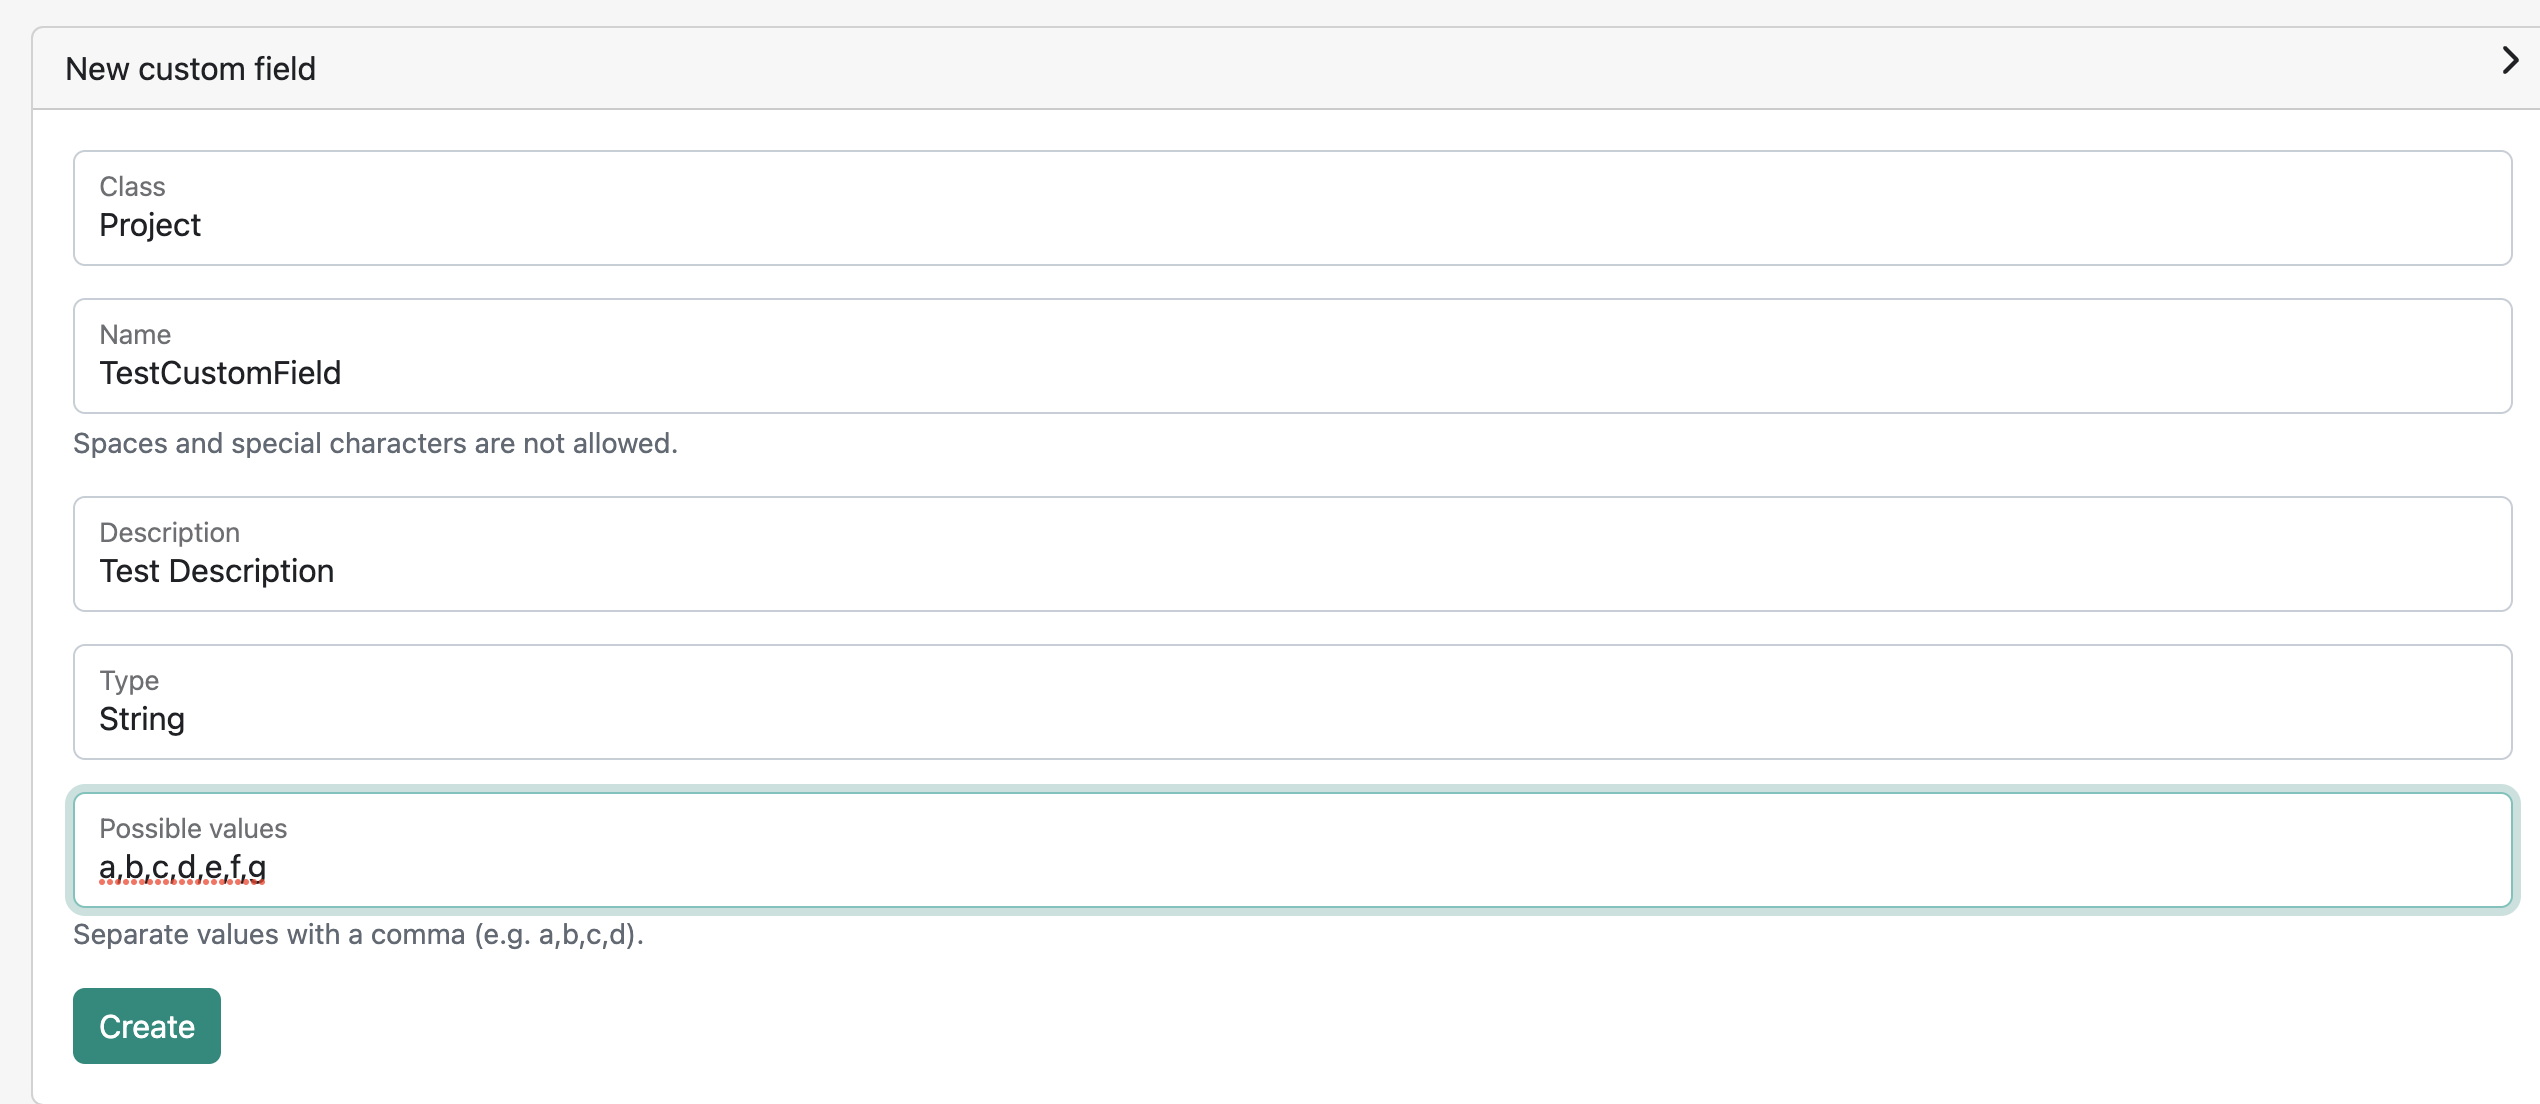
First of all, a class for the new field has to be chosen, the options are: Project or Time entry:

After selecting the class, the fields for Name, Description, Type and Possible values have to be filled in.
No spaces or special characters are allowed for the Name!
By clicking on "Create", the new custom field will be displayed, as shown below
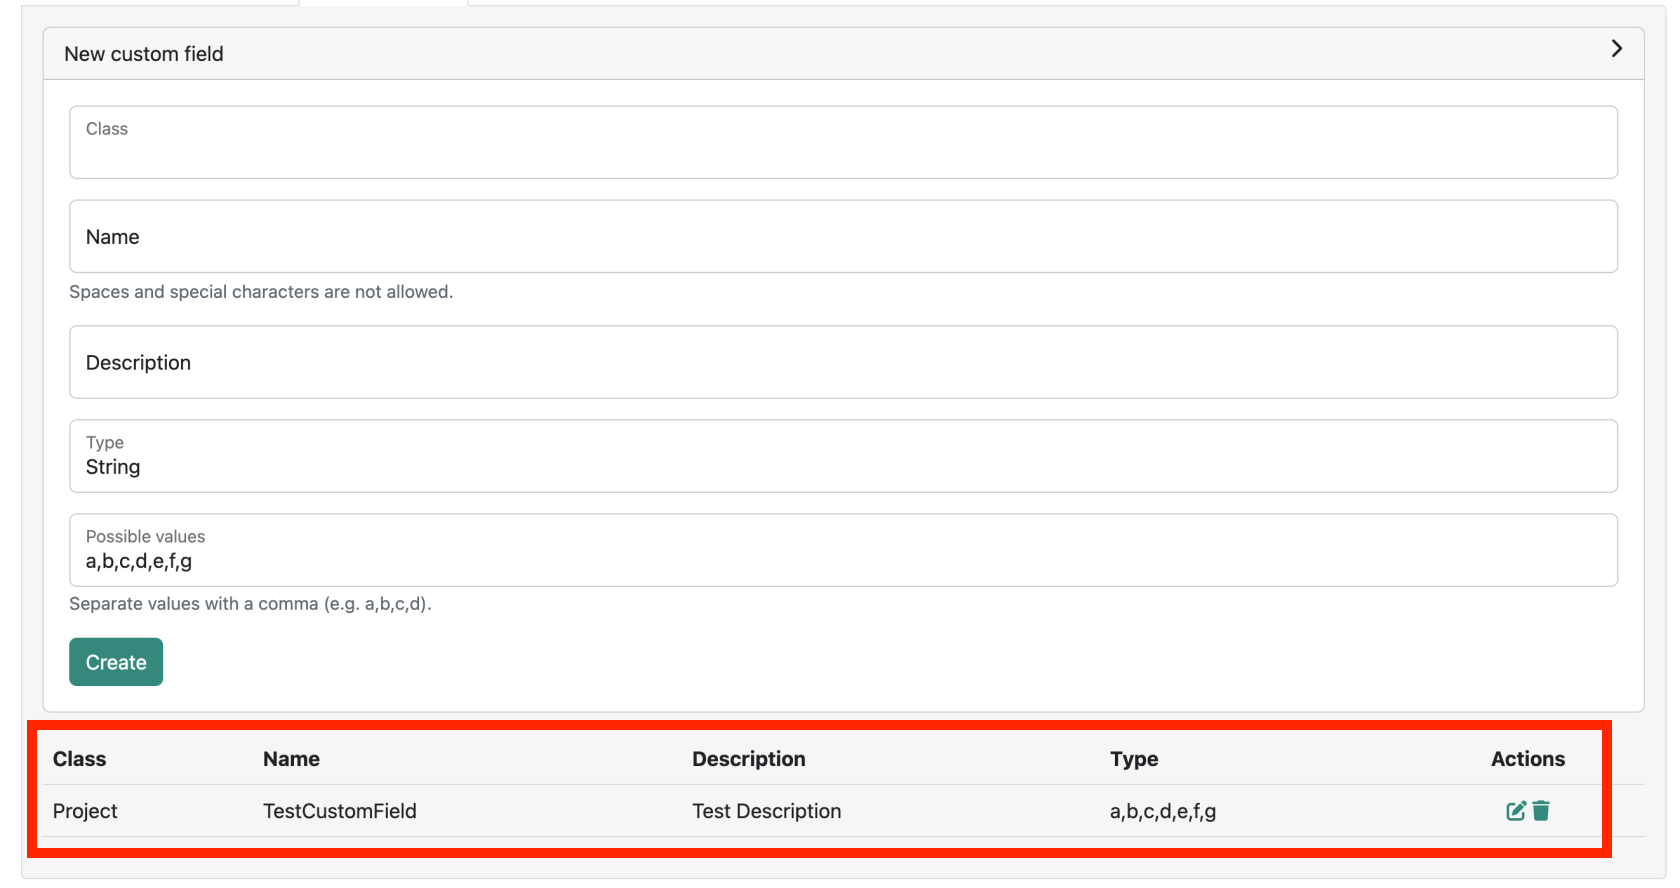
It is possible to edit and delete a created custom field by clicking on the corresponding icon under the Actions Section